

Hot Software Tips How-Tos


How To: Reduce noise in RAW Therapee
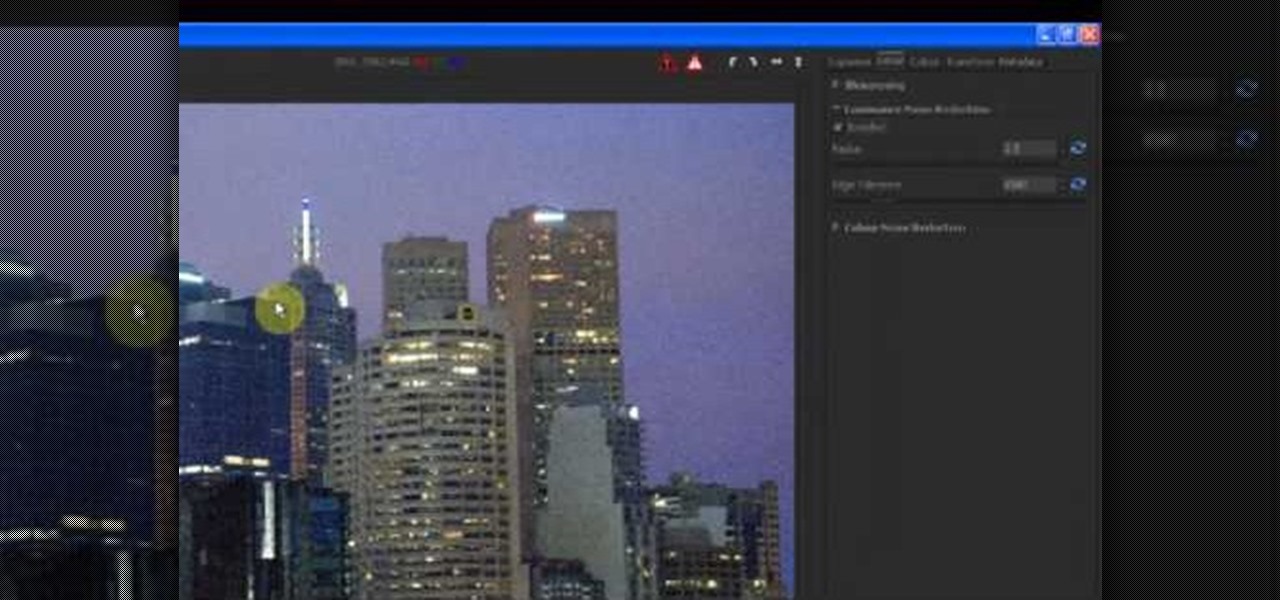
In this tutorial, we learn how to reduce noise in RAW Therapee. First, open up your photo in the software that you want to reduce the noise on. Then, open up the detailed view of the photo and click on then click on the detail button. Through here, you can sharpen the image or you can change the noise reduction for the color and luminance. Click on the drop down menu for the luminance and then enable to checked section. Then, move the edge tolerance to its maximum to see the full effect on th...
How To: Create rounded-corner rectangles in Xara Xtreme
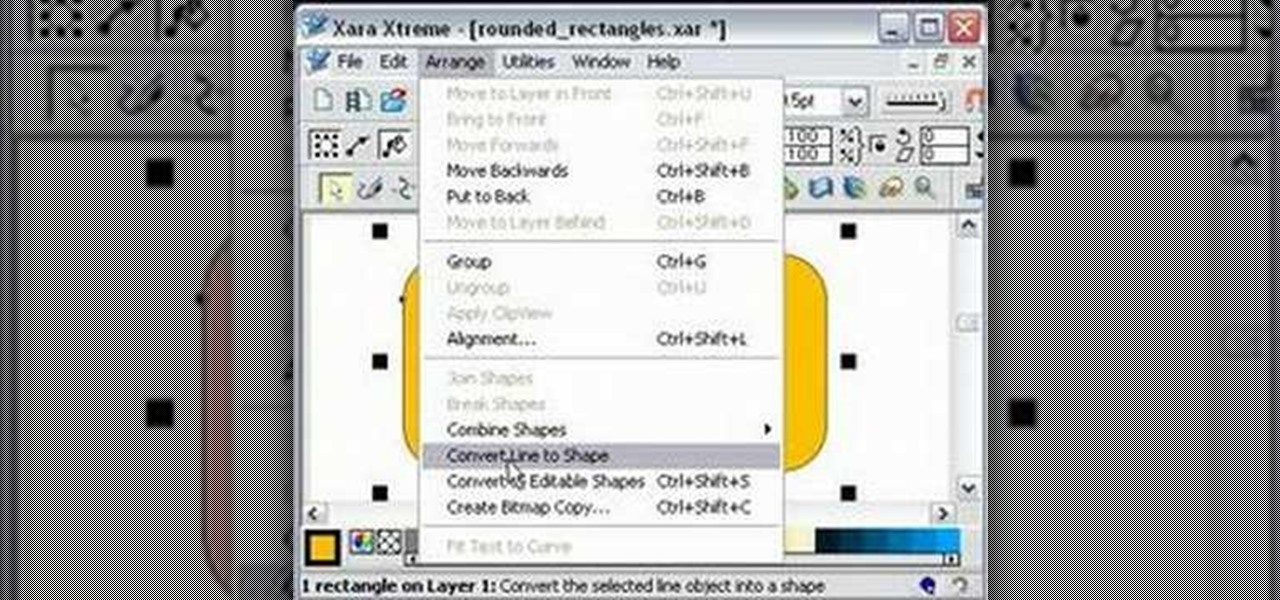
One must have often wondered how to create rectangles with smooth rounded corners. Open Xara Xtreme and create a rectangle on the stage. To change it to rounded corners, click on 'curved corners'. Then one can edit how much curve is required on the rectangle. If we scale the rectangle, then it will lose the curve path. So it should be converted to 'editable shapes'. This will maintain the curves, even if scaled from one angle. This will be helpful to create those party fliers.
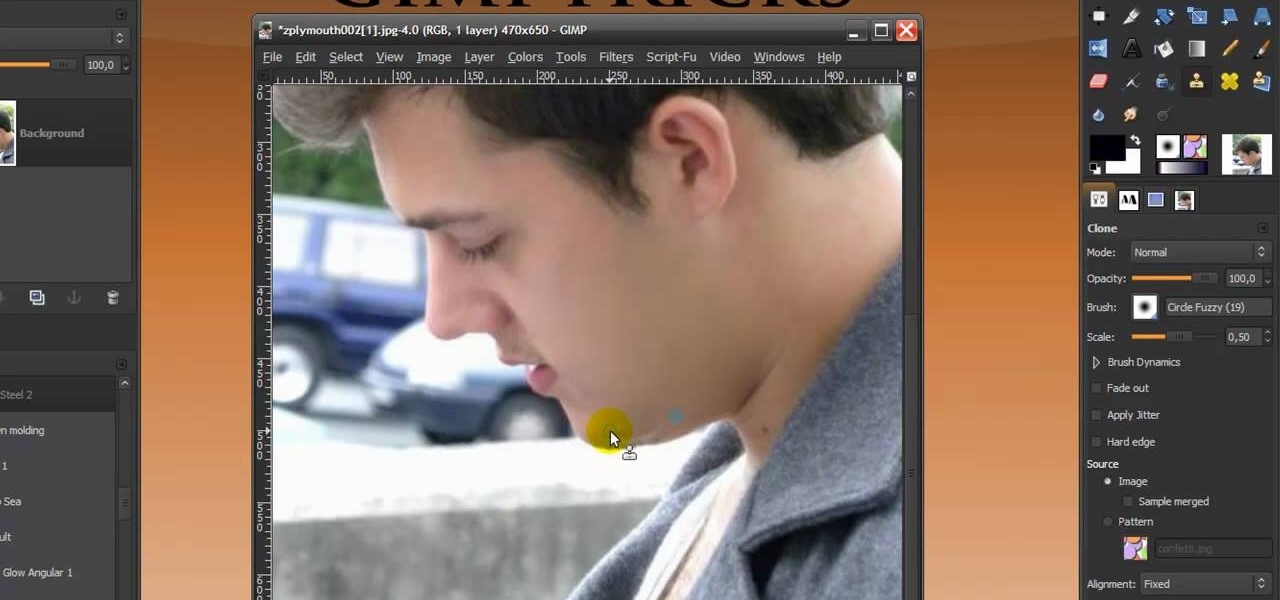
How To: Give someone a shave in GIMP
In this Software video you will see how to give someone a shave in GIMP. Learn spot removal, skin smoothening and a makeover or removing a 1 day beard. This is done using the Clone and the Healing tool. To use the Clone tool, select the tool from the right hand panel. Then to select the source skin color, you have to hold ctrl key down and click. Now when you apply it to the area you will get the same shade of the source color. So, you will need to select an area very close to the spot you ar...
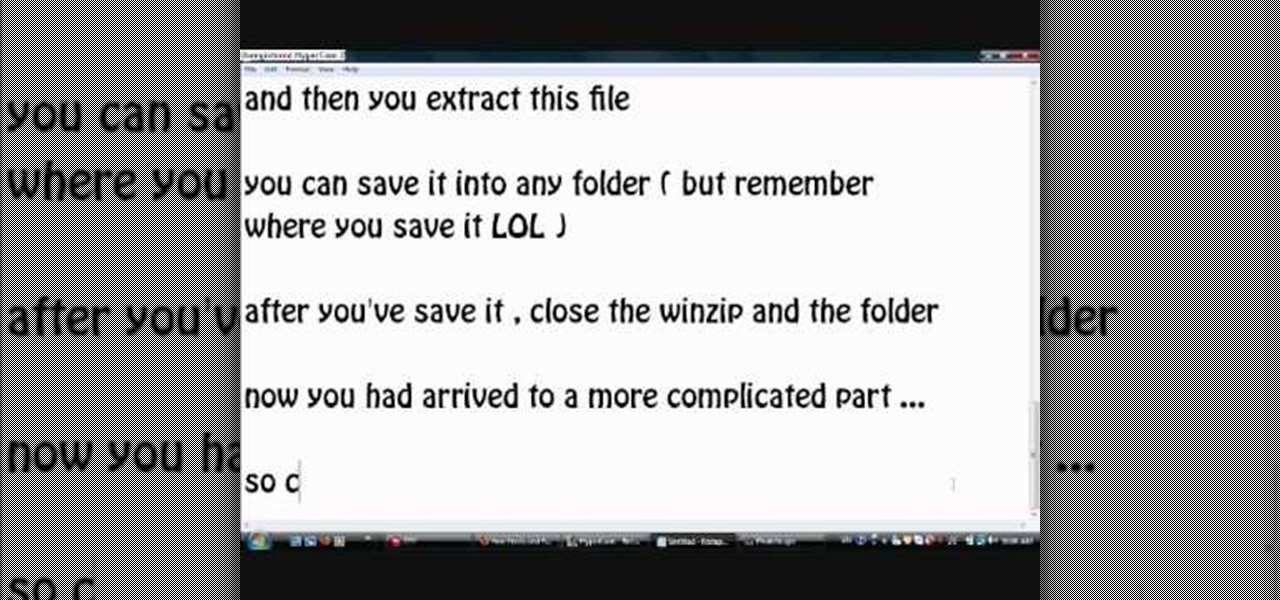
How To: Install additional fonts in Photoscape
Photoscape is a piece of free, photo editing software to use instead of more costly programs such as Photoshop. The program is pretty cool but you may want to install more fonts than what it comes with. If so, check out this video and you'll find out how to get it done. You'll need a zip program like winzip or winrar and you'll of course need Photoscape which you can get here.

How To: Download Videos with One Click in Freemake Video Downloader
Looking for the fastest and easiest way to download videos from YouTube, Facebook, MTV, Vevo, and other sites? If so, read this guide. Freemake Video Downloader 2.1 offers a brand new mode to get web videos offline in a single click!
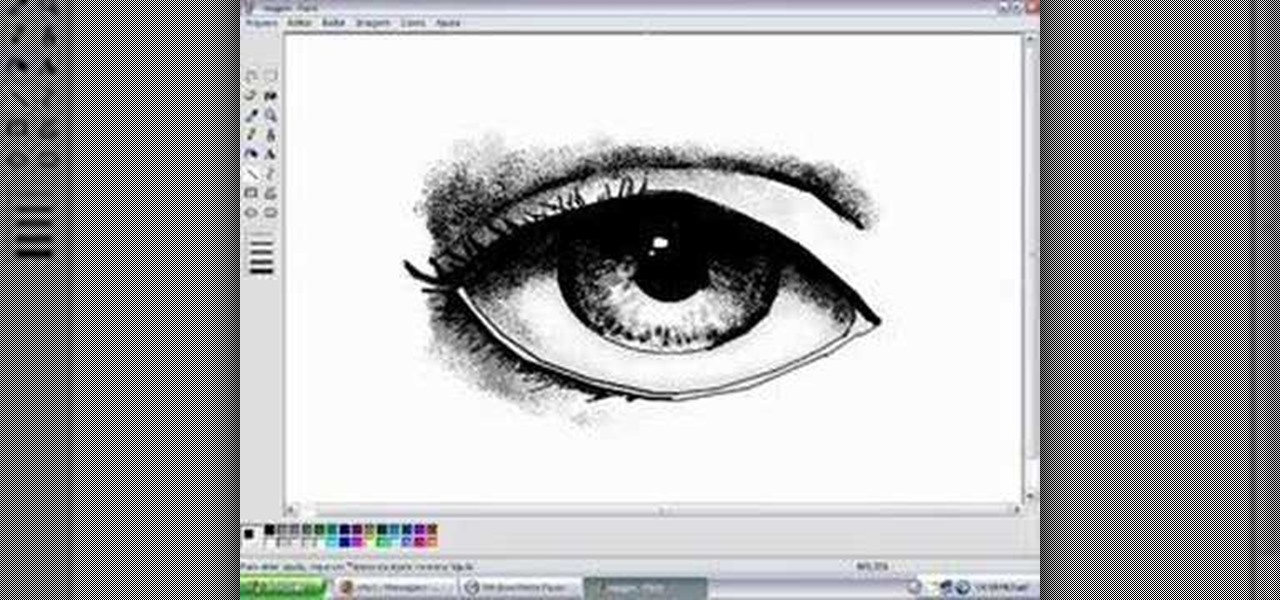
How To: Draw eyes in MS Paint
In this tutorial, we learn how to draw eyes in MS Paint. Start out by drawing the outline for the eye using a thin marker. After this, draw on a thicker line at the top of the eye and then draw on the crease of the eye above this. Now, draw in the details of the middle of the eye and start to shade in around the crease of the eye and the middle of the eye. From here, draw in the eyelashes on the top and the bottom of the eye, making them longer if they are for a woman. When finished, save thi...
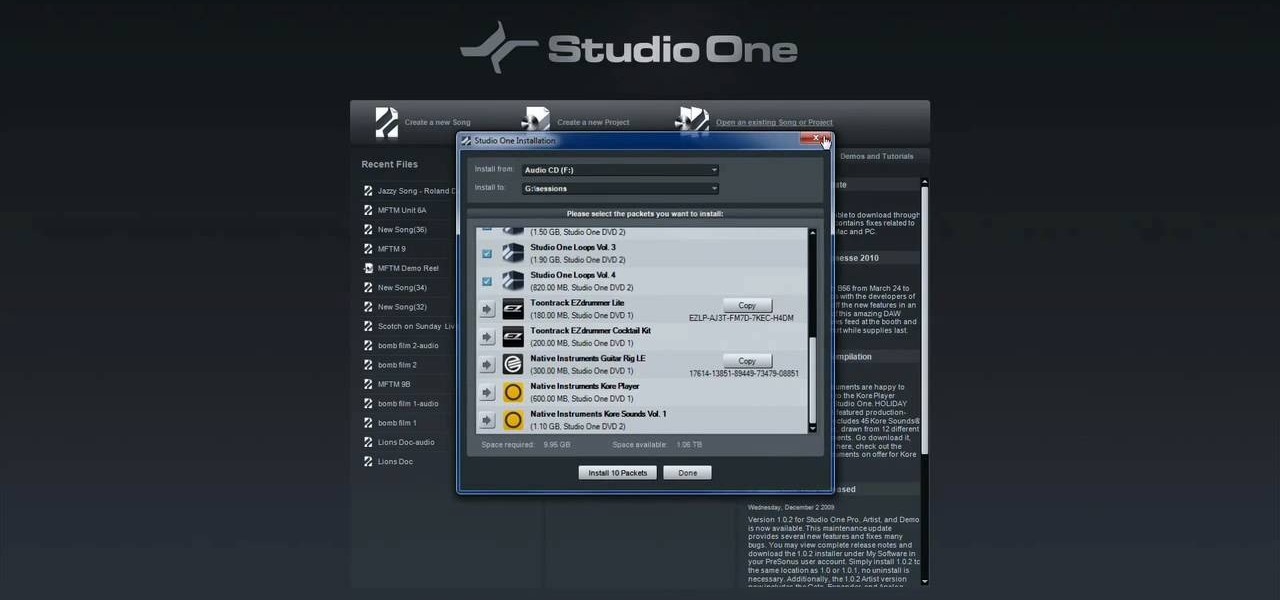
How To: Register & activate PreSonus Studio One online or offline
In this video tutorial, we learn how to register and activate Studio One either over the Internet or offline. Whether you're new to PreSonus' DAW or new to digital recording more generally, you're sure to find much to take away from this free video software tutorial. Take a look.
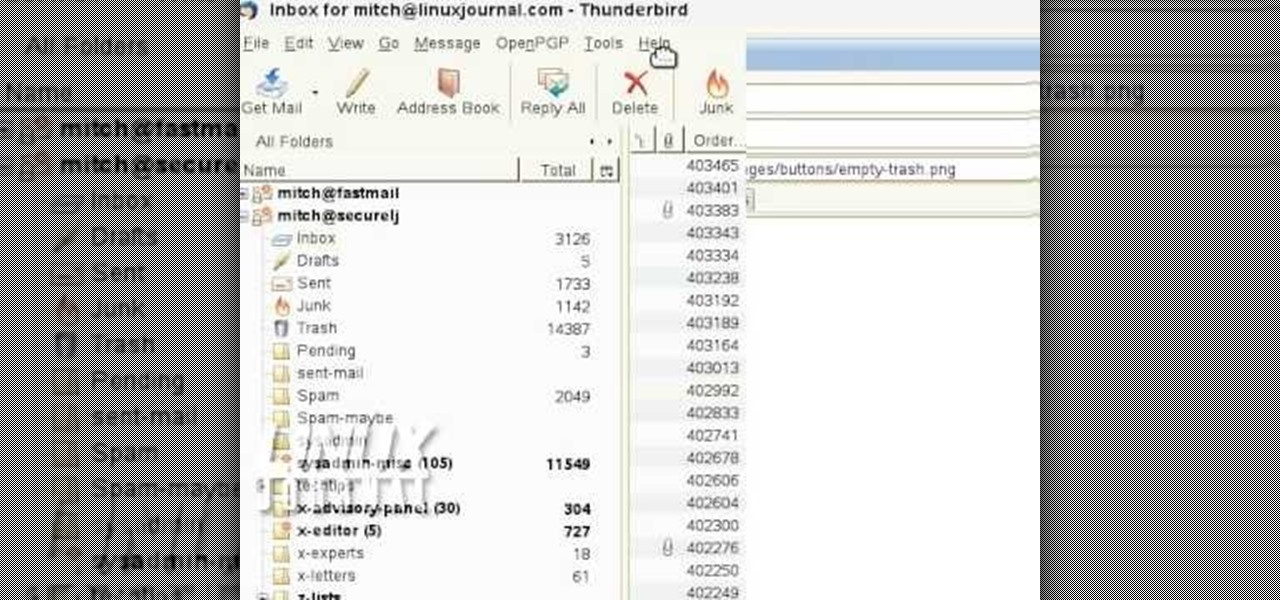
How To: Add custom buttons to a Thunderbird Toolbar
In order to add additional buttons to your Thunderbird Tool Bar, you will need an add-on called "Custom Buttons". It will allow you to add additional buttons to your tool bar. You will need to give instructions for the buttons, which you will use Java Script in order to set it up. Otherwise, the button will not have a function.
How To: Enhance the color of your lips & eyes with GIMP
In this tutorial, we learn how to enhance the color of your lips and eyes with GIMP. To change the eyes, use the ellipse tool to highlight each individual eye, then change the contrast of the eye as well as the color and highlights. Do this for both eyes, then save. To change the lips, use the lasso tool to highlight the outside and inside of the lips, then go to "select", "from path", and then change the color balance as you did on the eyes. Change it until it's the desired color you want, t...
How To: Make a YouTube channel logo using Photoscape
If you don't have a thousand dollars to buy the latest version of Photoshop, you will need to explore other options for making your logos. In this tutorial, learn how to save money without sacrificing quality and use Photoscape. This clip will walk you through the process step by step so you can make your channel really stand out.
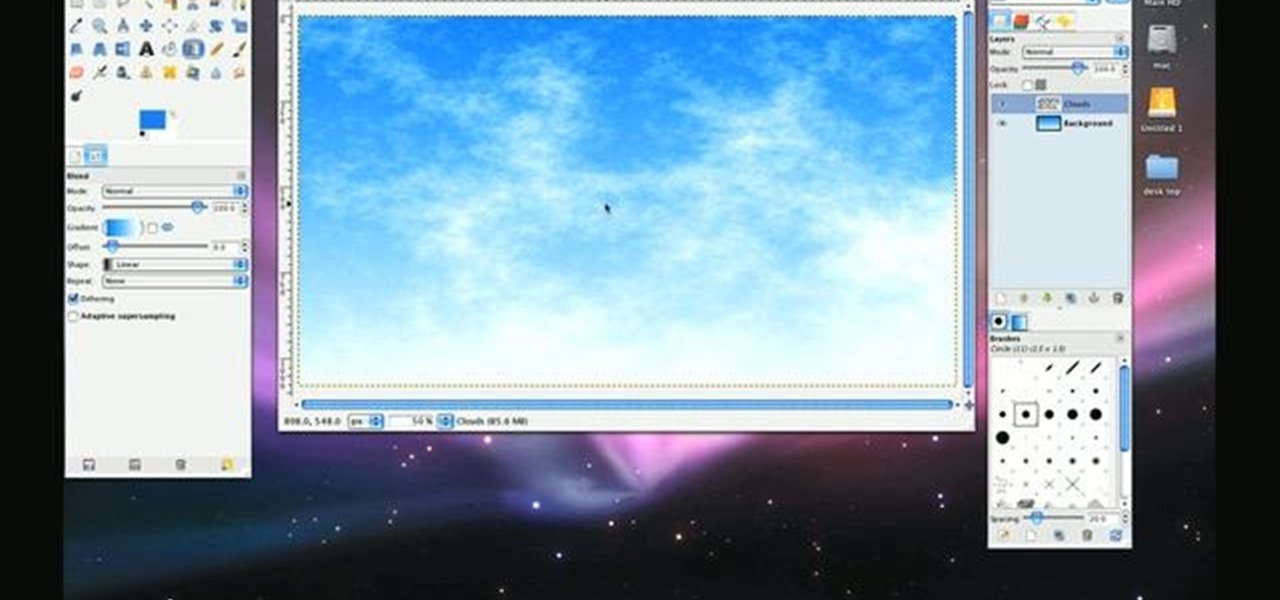
How To: Generate realistic clouds with the GIMP image editor
In need of a sunny, blue sky? Generate one in GIMP! Whether you're new to the GNU Image Manipulation Program, GNU's popular free graphics editor, or a seasoned designer just looking to pick up a few new tips and tricks, you're certain to enjoy this free video software tutorial. For more information, including detailed, step-by-step instructions, and to get started making realistic clouds in GIMP yourself, take a look.

How To: Make a bootable ISO image or CD/DVD
Ali440134 demonstrates how to make a bootable ISO image or a CD / DVD disk. Making a bootable ISO disk is easy and requires just a few simple steps to complete. First, use the Magic ISO program to make the disk. Open Magic ISO and click your desired file. Then, click the open button. Your Magic ISO panel should then say Bootable which means that you can make a bootable disk. Next click tools and under the tools drop down menu click the burn CD / DVD with ISO option. Then, select your file and...
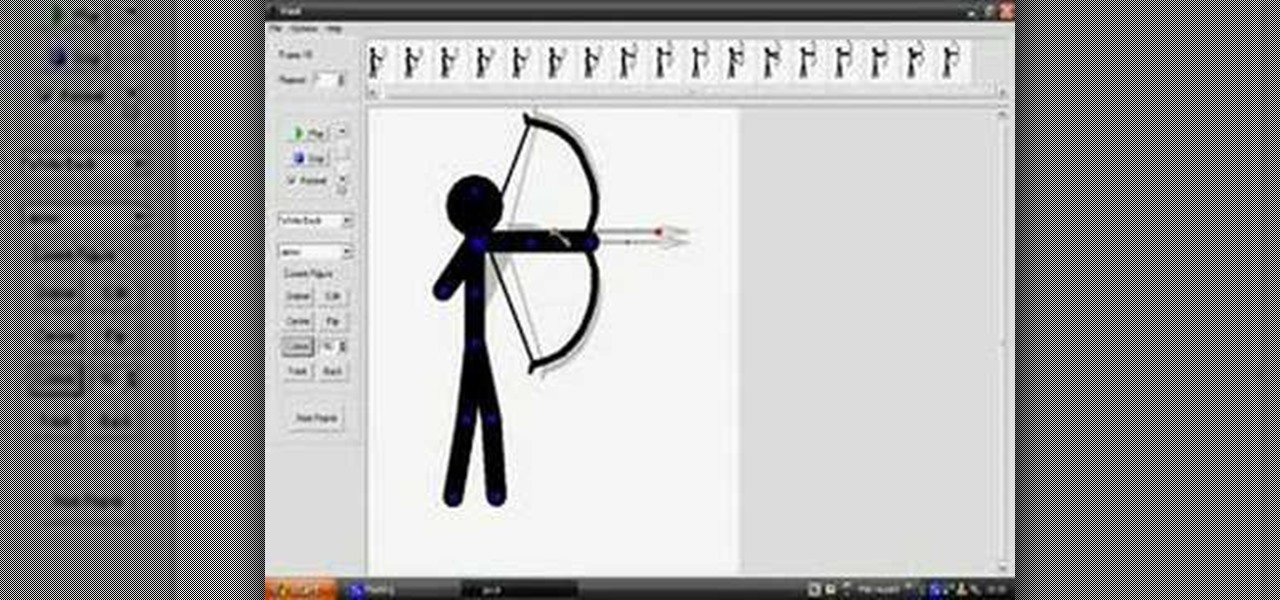
How To: Shoot a bow in Pivot
In this Software video tutorial you are going to learn how to shoot a bow in Pivot. Open Pivot and select a stick. You can adjust the size of the working space. Adjust the position of the stick in to an arrow shooting position. Then put a bow in his hand and move up the arm to a horizontal position and move the bow in a similar manner. For every new position, click on ‘new figure’ and then adjust the position. While stopping, make the gaps smaller. Now start moving up the other arm. Then move...
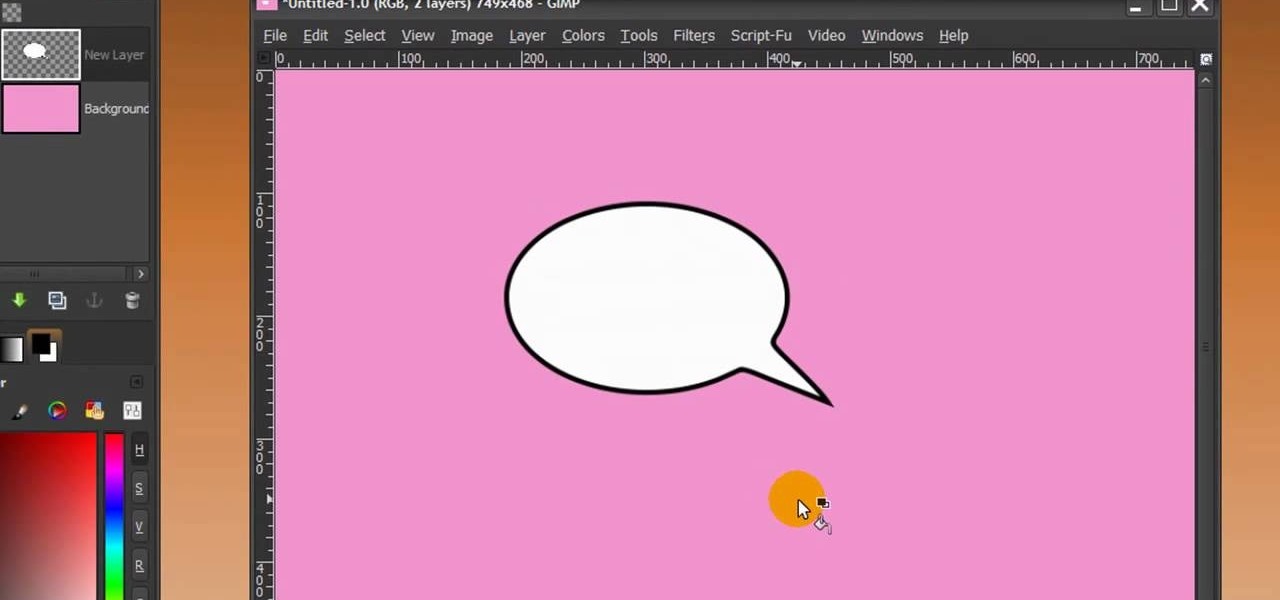
How To: Make a speech bubble in GIMP
First of all open any image and create a new ‘layer’ and add it to your image. Click on the transparency and then click ‘ok’. Now from the right menu bar choose the ‘elliptical’ icon to make a round balloon. Now select the 'free select tool' and select ‘mode’ to 'add to current selection' and then draw a triangle with the base inside the previous balloon and the pointed end outside the balloon. Now select the 'bucket fill' tool and make sure your ‘background’ color is selected as white and th...
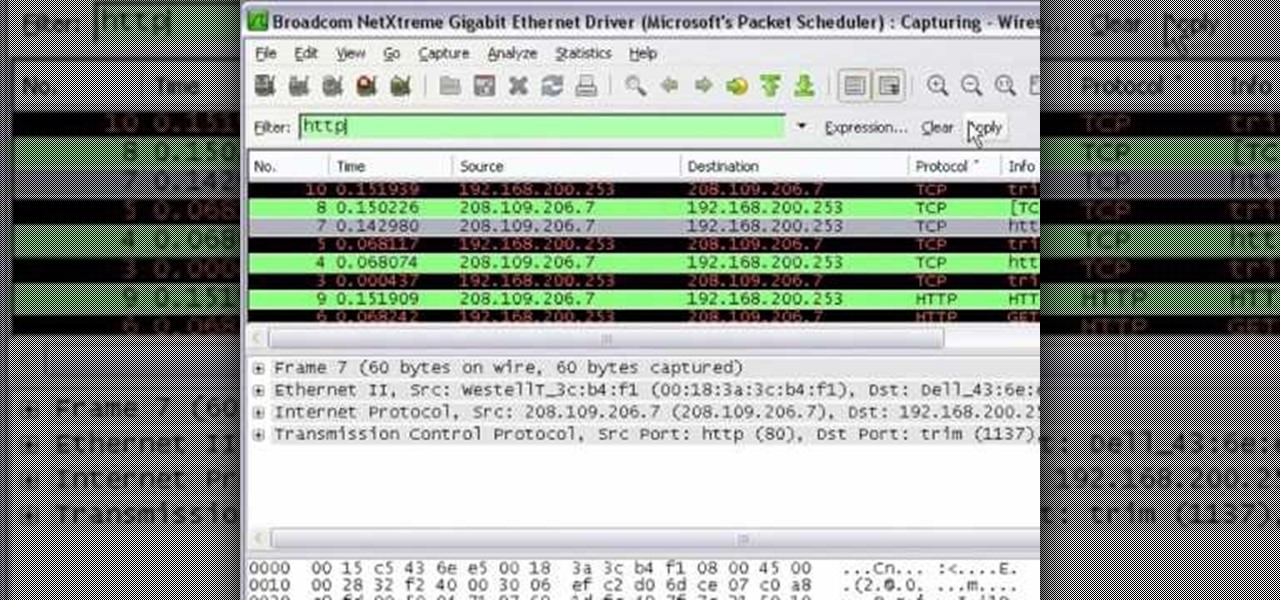
How To: Get started with Wireshark
In this tutorial Mike Lively of Northern Kentucky University shows you how to get started with Wireshark. Wireshark is a network protocol analyzer for Unix and Windows. It is used for network troubleshooting, analysis, software and communications protocol development.
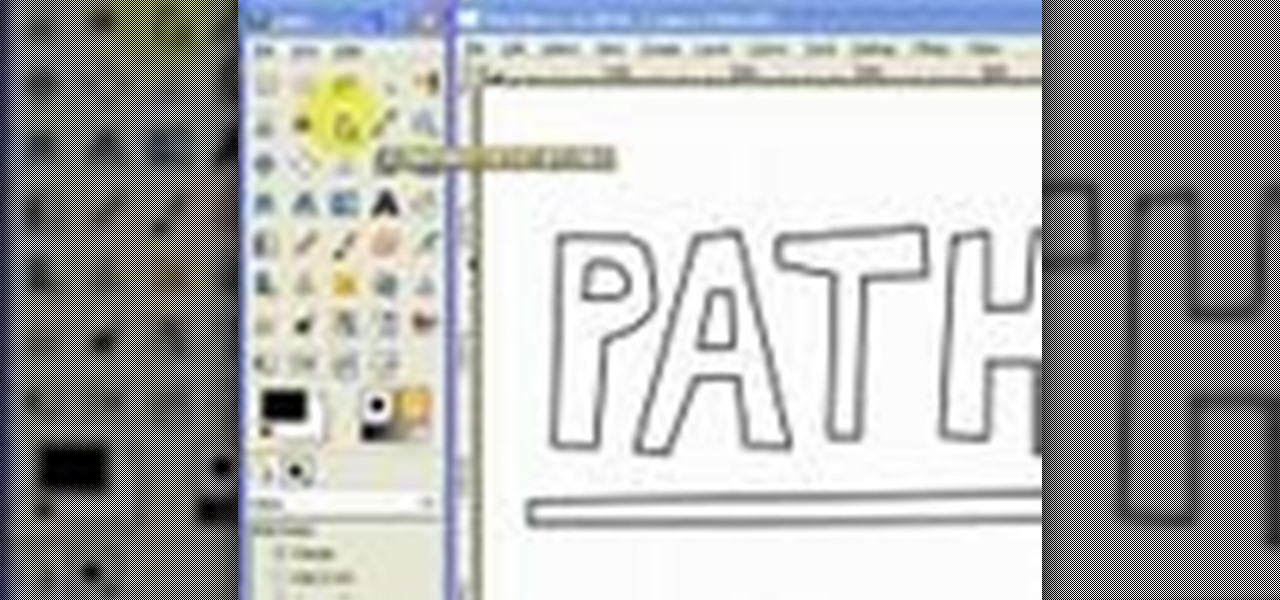
How To: Draw vector art using the path tool in GIMP
This video will introduce you to the basics of creating vector art in GIMP by teaching you to draw using the path tool.

How To: Create a lifelike head in Genhead 3.1
In this video tutorial, you'll learn how to use Genhead 3.1 to create a lifelike head from photographs.
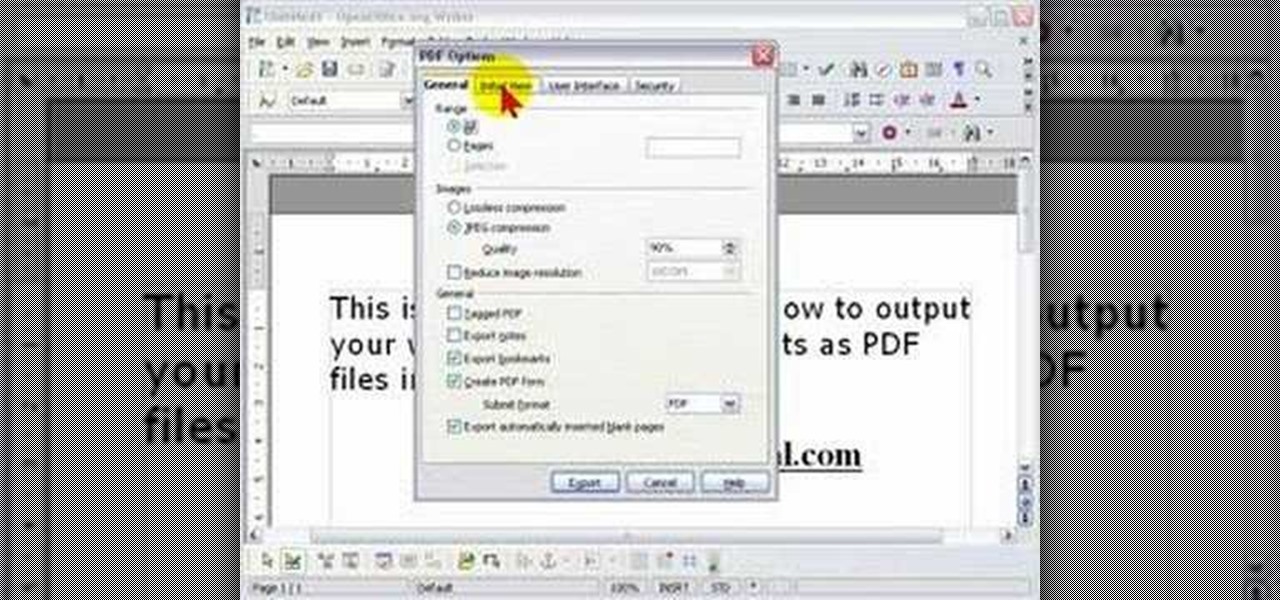
How To: Export OpenOffice Writer documents as PDF files
In order to protect your word processed documents, it is a good idea to export them for distribution as PDF files, which allows you to encrypt, and add password protection to your work.
How To: Play Google Video files in Windows Media Player
This video demonstrates how to download Google Video movies onto your computer and play them using Windows Media Player. The video walks you through downloading the right software, downloading the video you want, modifying the movie, and playing in Media Player. This video is silent and goes fast, so you will have to watch a few times to understand what is happening.
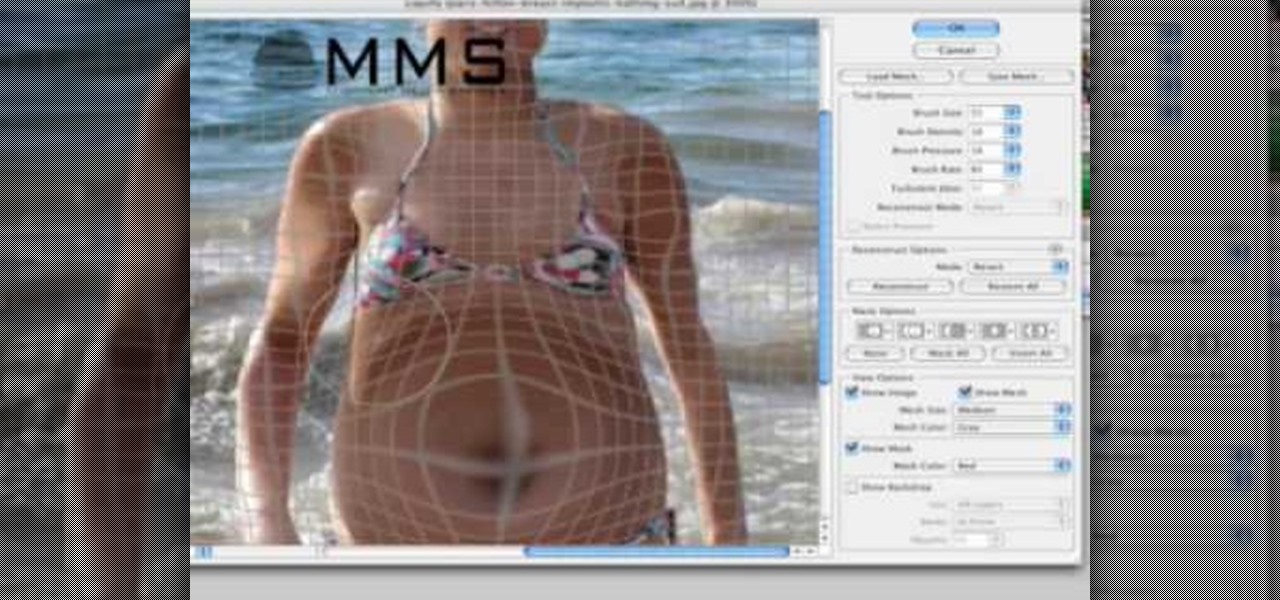
How To: See Through Clothes with Gimp 2.6
If you can't seem to find any photos of naked people on the internet, don't fret, this how to will show you how to "see through" clothing using some simple techniques with Gimp 2.6 photo editor. Gimp is like Adobe Photoshop without the heavy price tag. Tight, white clothing works best for this trick, so keep that in mind. Watch the video and get one step closer to seeing someone naked. Right on your own computer! See through clothes with Gimp 2.6.
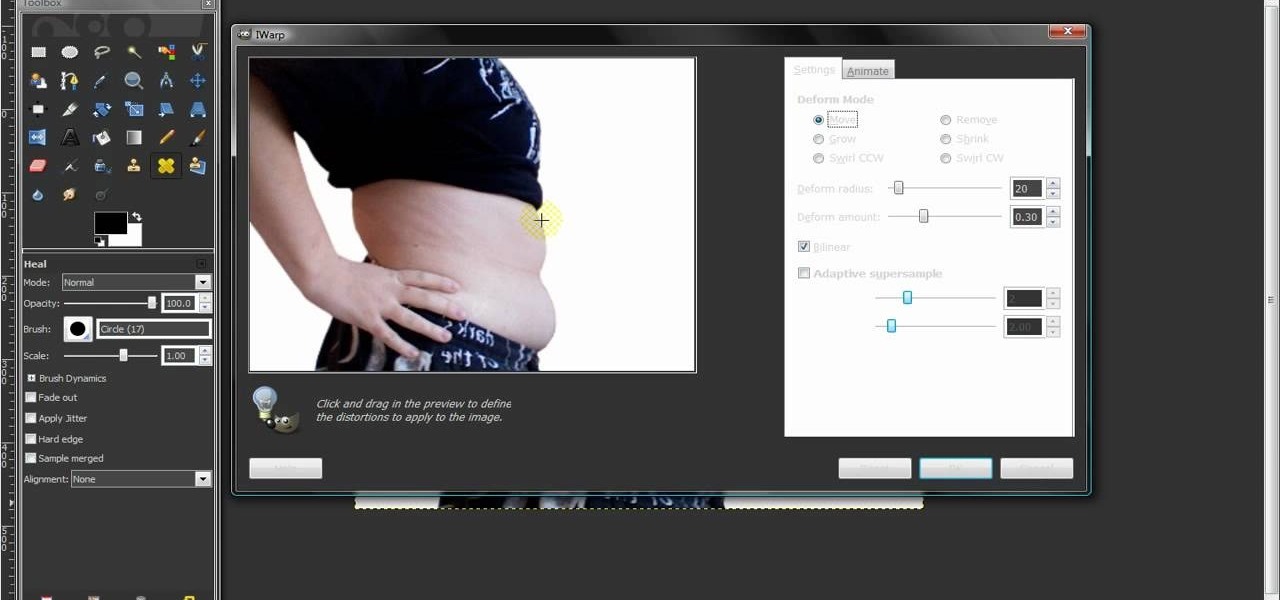
How To: Remove body fat or stretch marks in GIMP
In this video, we learn how to remove body fat or stretch marks in GIMP. First, go to filters, then distort, then warp. When you are in this window, you will be able to see all the different distortions that you can do. To help you remove the fat, use the "move" tool and a proper sized brush. Now, press on the stomach and slowly press down on it until you see the part of the body start to become smaller. Don't do it too quickly, or the picture will look fake. When finished, save your new pict...
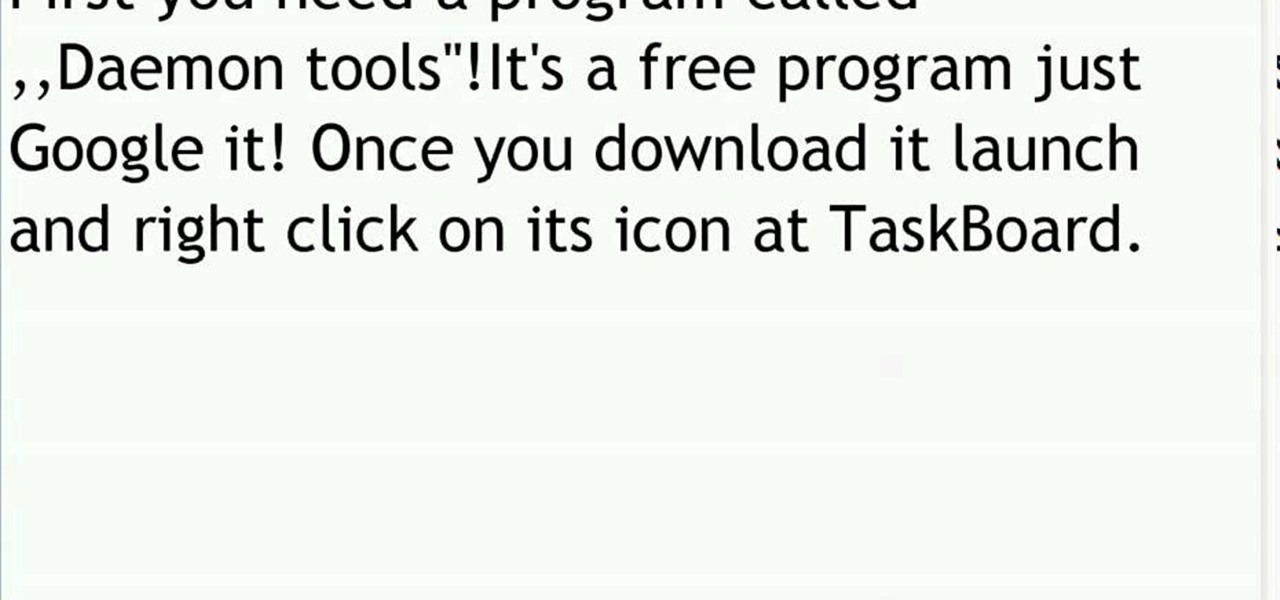
How To: Mount ISO, BIN, or CUE files using Daemon Tools
In this video tutorial, you will learn how to mount and unmount an .ISO, .bin and .cue image with daemon tools. This is useful because when you download a game, movie or an application, you usually get an .ISO, .bin or .cue file.
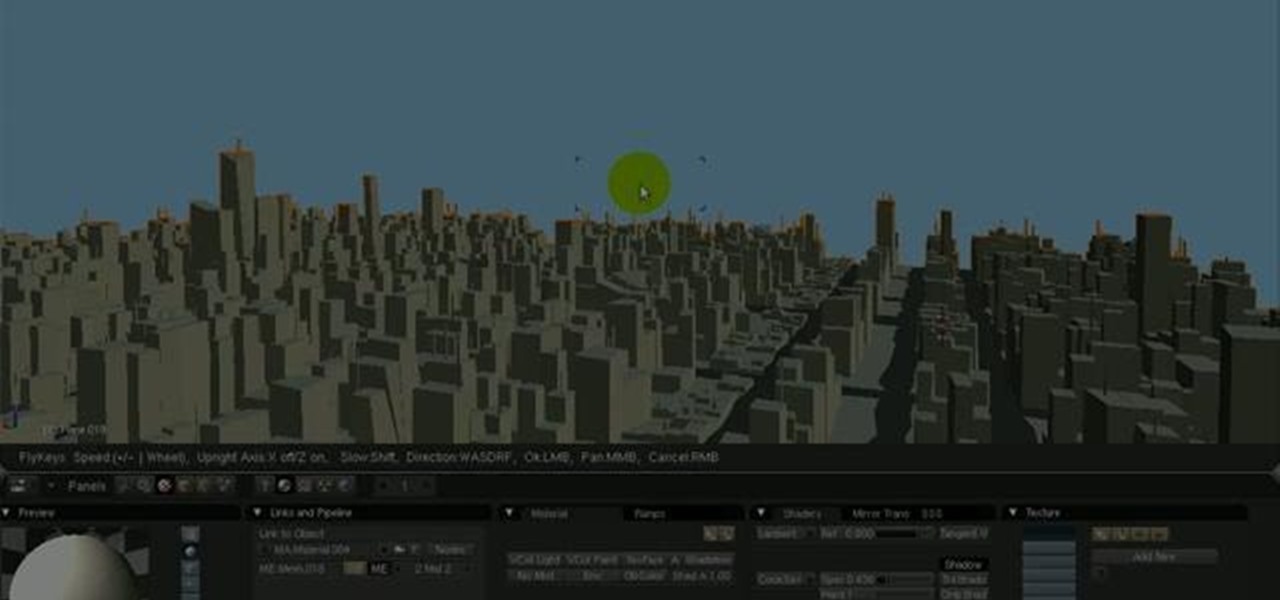
How To: Use the camera fly mode tool in Blender
See how to work with Blender's Camera Fly Mode tool. The tool is a great way to help navigate your 3D scene, and also for camera placement (or any object set to be a "camera", for example a Spotlight). Whether you're new to the Blender Foundation's popular open-source 3D computer graphics application or are a seasoned digital artist merely on the lookout for new tips and tricks, you're sure to be well served by this free video software tutorial from the folks at CG Cookie. For more informatio...
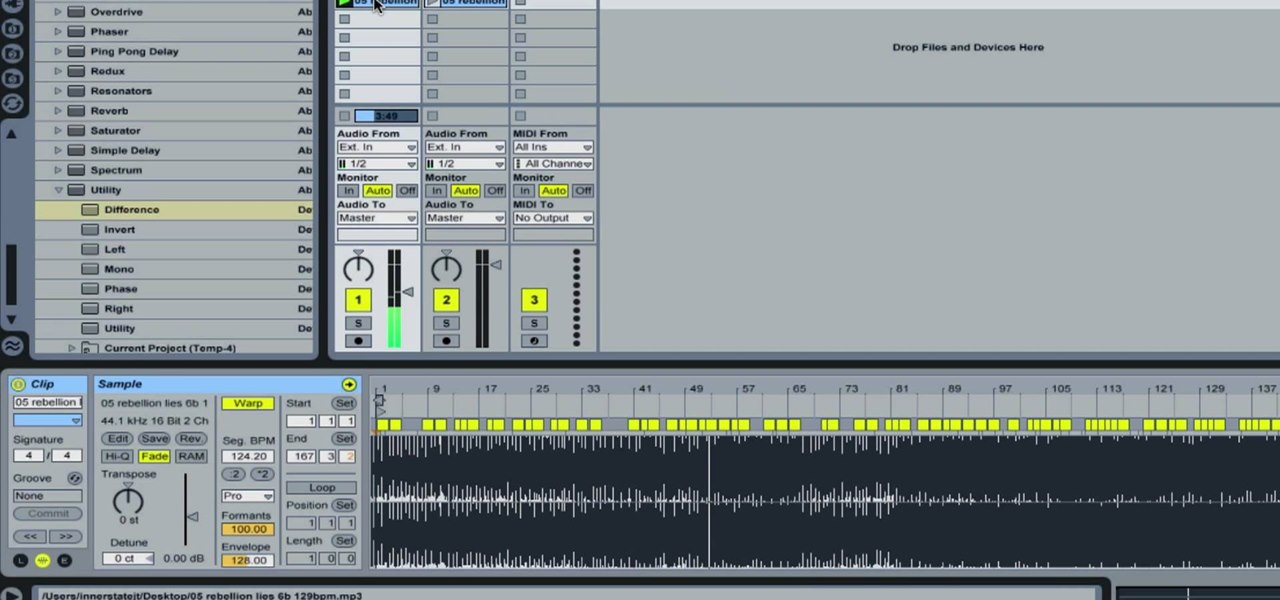
How To: Remove Vocals from a Song in Ableton Live
In this how-to video, you will learn how to remove the vocals on songs using Ableton. First, open the tracks you want to remove the vocals from. Go to utility and select the preset difference. Drag it to the audio track. This will remove vocals.
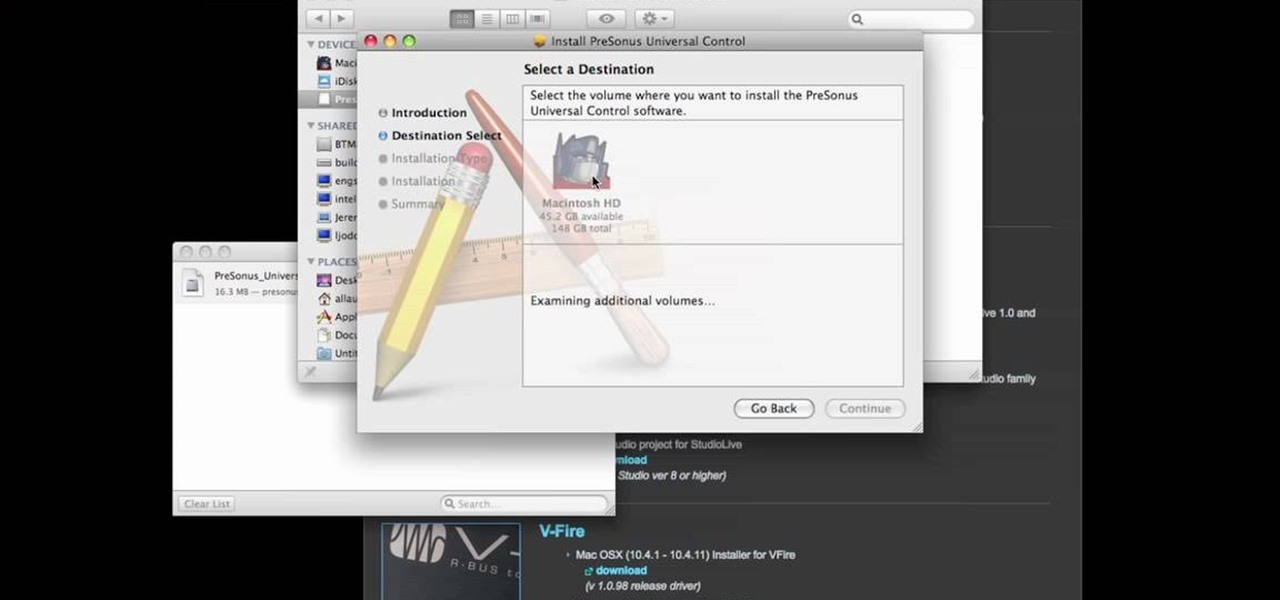
How To: Download and install PreSonus Virtual StudioLive
In this video tutorial, we learn how to download PreSonus Virtual StudioLive from the PreSonus website. Whether you're new to PreSonus' DAW or new to digital recording more generally, you're sure to find much to take away from this free video software tutorial. Take a look.
How To: Save your project in Pinnacle Studio
This tutorial explains how to save your work in Pinnacle Studio. The first step is to go to "File". Next is saving projects by using the drop down menu from the top left corner of the program. When you save your project it does not mean that all the video files will be saved. In fact, all the original files have to be stored in the exact same place so this will work. To save your new project you have to go to movie and make and output format like Vdix or VCL.
How To: Use Transparency Tool Xara Web Designer
In this web design tutorial learn how to apply flat fill transparency vs. linear transparency fill. This web design tutorial will give you a very basic understanding of how to apply transparencies and show objects that are underneath transparent objects.
How To: Convert Videos to Different Formats for Free with Format Factory
In my last article, I discussed how you could download almost any video from almost any video sharing site using the free NetVideoHunter add-on in Mozilla Firefox. Now in this article, I will discuss how to convert those videos you’ve downloaded to any format—also for free. Most of the time, the videos you download with NetVideoHunter are in FLV (Flash video) format, which is something that not all video players can play. That’s why I made this article.

How To: Create a login form using MS Access 2007
If you want to password restrict some of your data, or just want to know who is doing what in Microsoft Access 2007, you will want to set up a login form for MS Access 2007. This is an easy procedure, and you can create one yourself with just a basic understanding of the structure for MS Access. Watch this video, and Uncle Gizmo will show you how to do a login form and several other forms for MS Access.
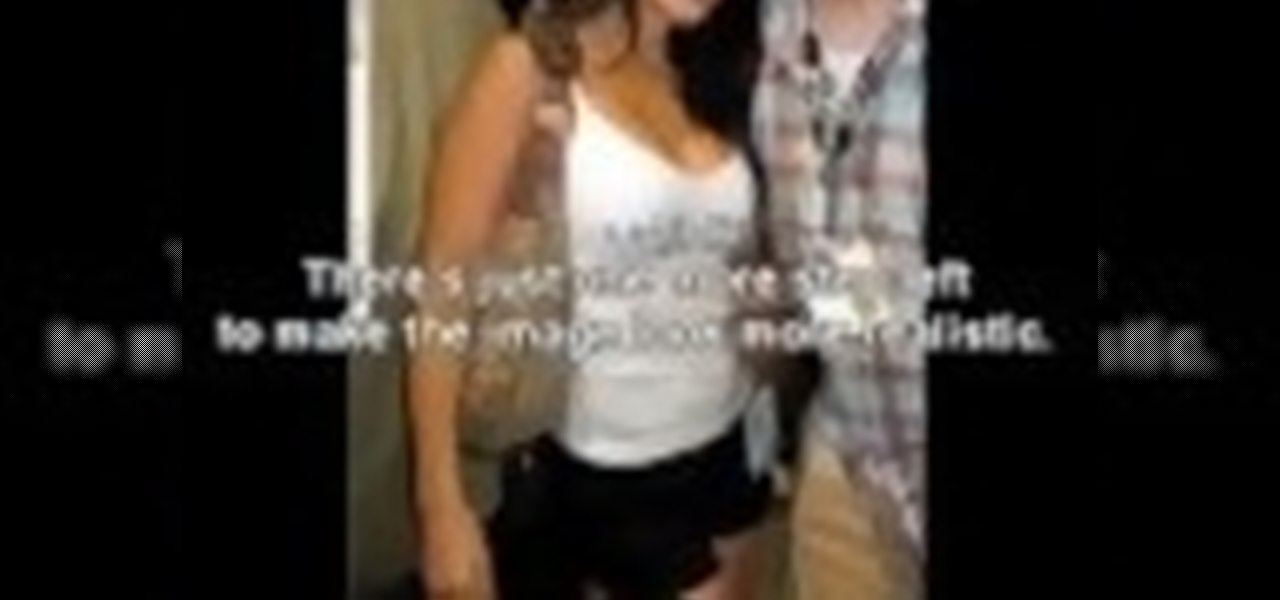
How To: Make someone look fat with Photoshop
Well, usually people are looking to go from fat to thin, but sometimes it's fun to see what a person would look like if they were on a full Twinkie diet. Well, this tutorial shows how to use the liquify tool in Adobe Photoshop to add weight to someone to make them look pudgey, overyweight, fat or even downright obese. The tool is easy to use and the video shows clearly how to turn that beach babe into a Jenny Craig "before" photo! Check it out and YOU can make people look fat in photos.
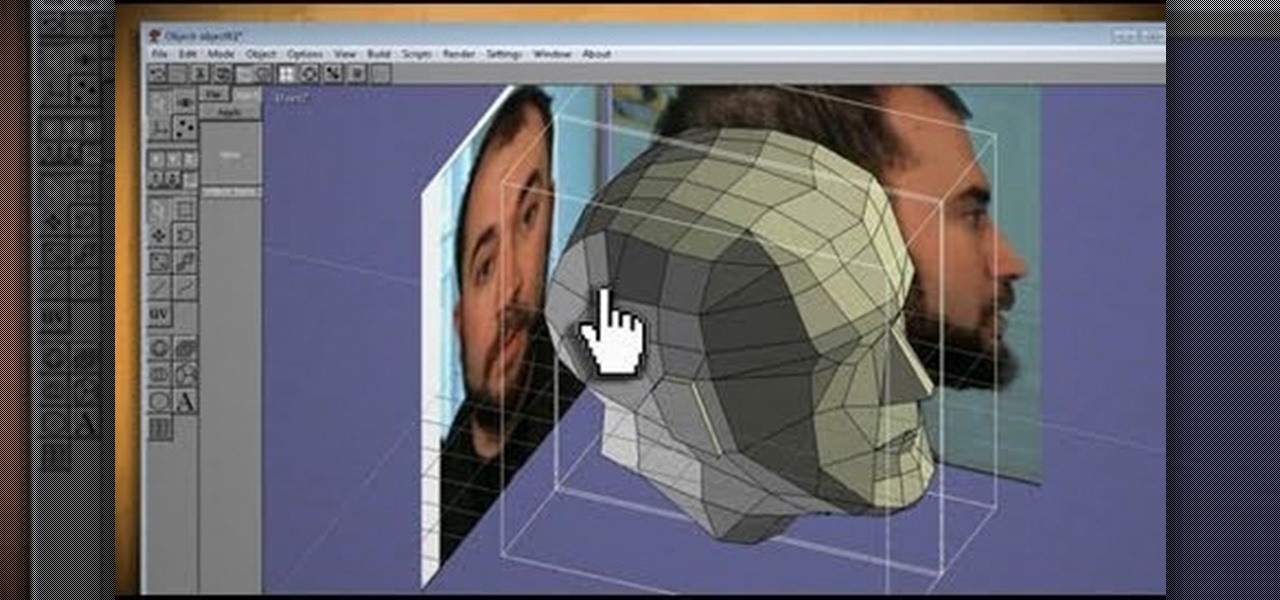
How To: Clone your head, face or anything, then print in 3D, with Anim8or & Pepakura
What could you do with two of you? Or, two cats, or two cars, or two of anything? Cloning, it's the way of the future and this tutorial shows you how to clone and print a 3D model of virtually anything. Using Anim8or and Pepakura Designer you can model your face and print it up to create a 3D mask. Two for the road I say! (Or would that be four?)
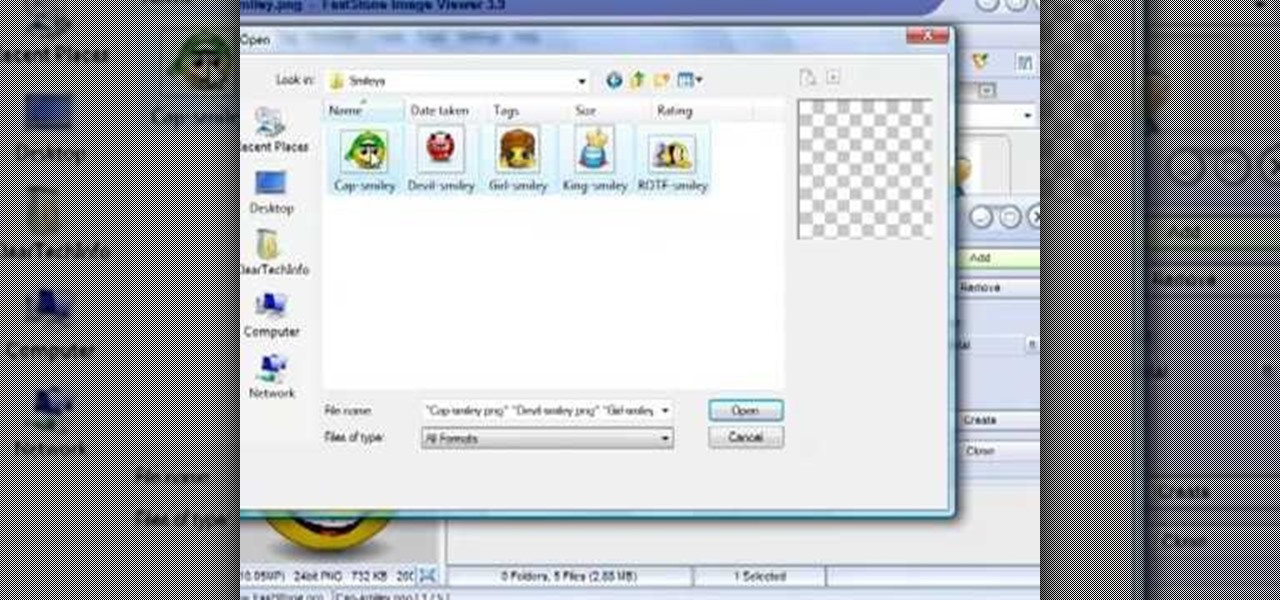
How To: Make an image strip using FastStone Image Viewer
In this tutorial, we learn how to make an image strip using FastStone Image Viewer. First, open up the images that you want to have inside the strip. Then, open up Fastone Image viewer and find the location of the images. From here, go to "create", then "image strip builder". This will bring up the builder window where you can add in the images you want to see on the strip. When finished, click on the "create" button. Now, the strip will come up on your computer in a new image and you will be...
How To: Use the blur, smear & sharpen tools in SketchBook Pro
Learn how to use the blur, smear and sharpen tools in Autodesk SketchBook Pro 2010. Whether you're new to Autodesk's popular raster graphics editor or a seasoned graphic artist merely looking to better acquaint yourself with SketchBook Pro 2010, you're sure to be well served by this free video software lesson from the folks at Lynda. For more information, take a look.
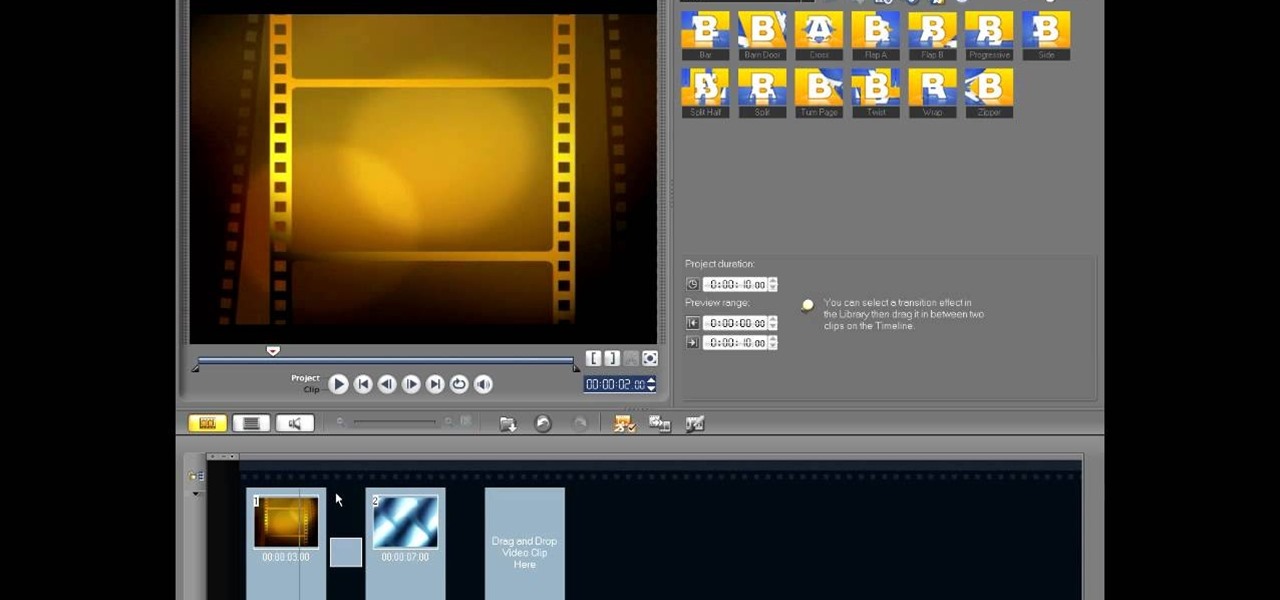
How To: Edit in storyboard mode in Corel VideoStudio
In this video tutorial, viewers learn how to edit in storyboard mode in Corel Video Studio. The storyboard mode is an alternative view for the time line. To switch to storyboard mode, click on the film strip icon above the time line. Storyboard arranges your project by element. To add a new element or transition in storyboard mode, click on the Edit tab and select the element or transition that you want by dragging it to the storyboard. This video will benefit those viewers who use Corel Vide...
How To: Install ISO game files with the use of Daemon Tools
In this video, the poster is teaching YouTube users how to use Daemon Tools mount games image files. That’s very useful to many people that cannot burn ISOS or any other image files into a blank media (CD, DVD). With the tips provided by this video, anyone can use Daemon Tools to mount the image in a virtual CD/DVD drive. Daemon Tools is a Freeware program and you can download it at many websites on the internet.
How To: Create Roy Lichenstein style Pop Art in GIMP
Learn how to produce Roy Lichenstein style Pop Art from your photographs using GIMP image editing software.
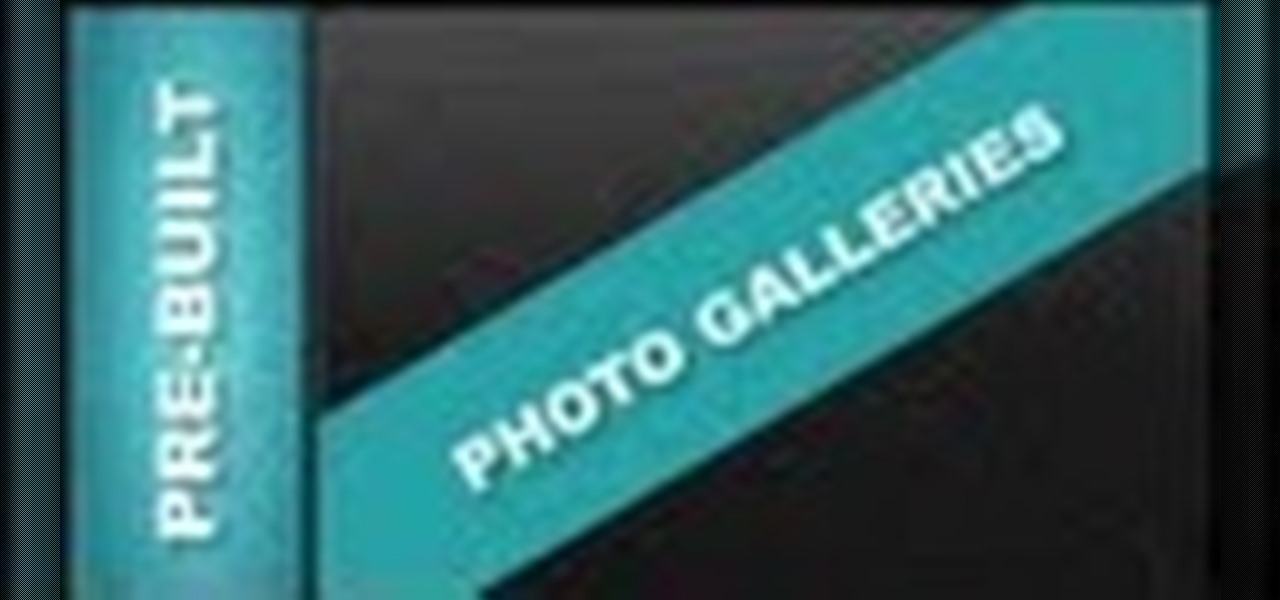
How To: Edit Pre-Built Photo Galleries Xara Web Designer 7 Premium
Tutorial for creating web design photo gallery. This Xara Web Designer Tutorial will give an overview of editing things such as but not limited to: captions, photos, pop-up properties, titles and so on. If you need assistance using Xara Web Designer let us know and we will do our best to create web design tutorials to help you.
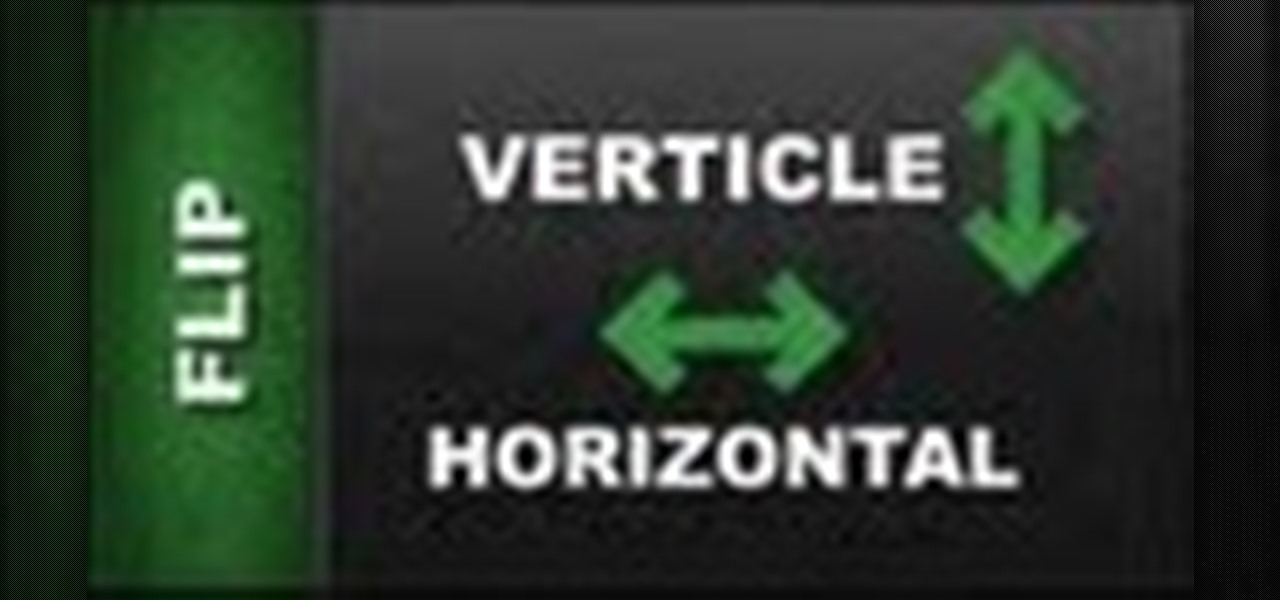
How To: Flip Object Horizontal & Flip Vertically in Xara Web Designer
In this Xara web designer tutorial you will learn how to use flip horizontal and vertical feature. The Xara Web Designer flip tool is used to change the orientation of an object. Imagine that the flip tool was a mirror and you could reflect an object in the opposite direction and that will give you an idea of how it works. The Xara Web Designer flip tool is great for creating reflecting objects, which you will get an opportunity to do in a much later tutorial.
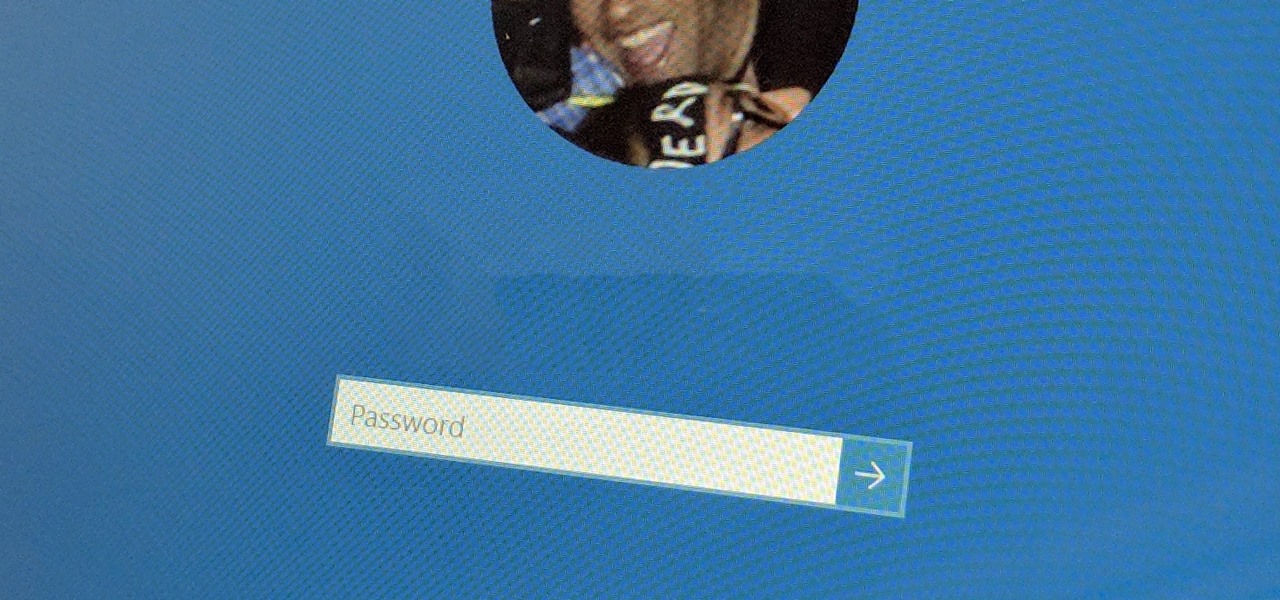
How To: Bypass the Password Login Screen on Windows 8
It's good to password-protect your PC to make sure that your personal files, folders, and important documents are safe and can't be modified without your permission. Though, entering the password all of the time before using your computer might frustrate you.
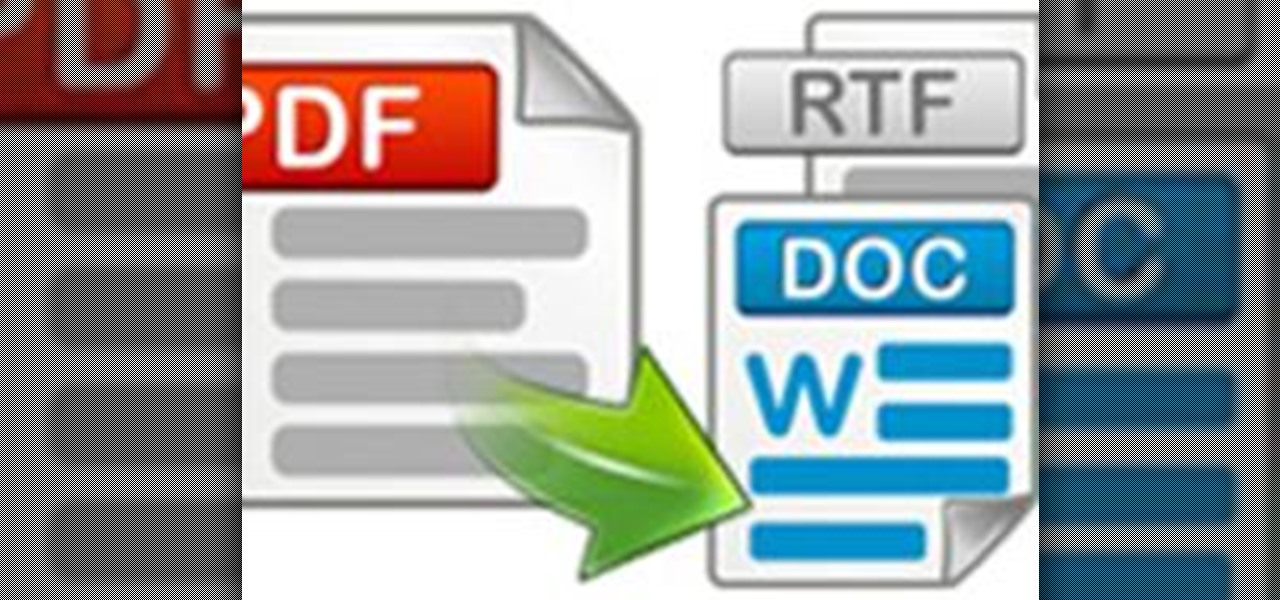
How To: Convert PDF to Word by Using Free Nemo Software
Nemo PDF to Word is a powerful but free tool to help us to convert PDF to Word with a few simple clicks. Even beginners who don't have much computer knowledge can easily manage it.
Next Page
Prev Page