


How To: Install ISO game files with the use of Daemon Tools
In this video, the poster is teaching YouTube users how to use Daemon Tools mount games image files. That’s very useful to many people that cannot burn ISOS or any other image files into a blank media (CD, DVD). With the tips provided by this video, anyone can use Daemon Tools to mount the image in a virtual CD/DVD drive. Daemon Tools is a Freeware program and you can download it at many websites on the internet.

How To: Make a bootable ISO image or CD/DVD
Ali440134 demonstrates how to make a bootable ISO image or a CD / DVD disk. Making a bootable ISO disk is easy and requires just a few simple steps to complete. First, use the Magic ISO program to make the disk. Open Magic ISO and click your desired file. Then, click the open button. Your Magic ISO panel should then say Bootable which means that you can make a bootable disk. Next click tools and under the tools drop down menu click the burn CD / DVD with ISO option. Then, select your file and...
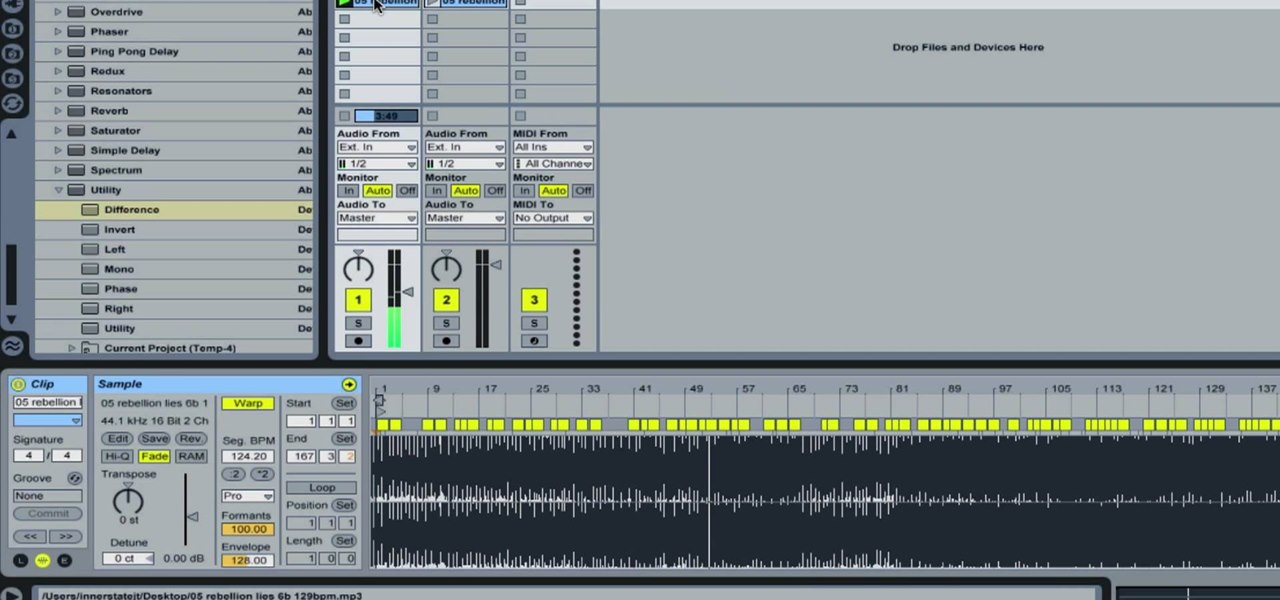
How To: Remove Vocals from a Song in Ableton Live
In this how-to video, you will learn how to remove the vocals on songs using Ableton. First, open the tracks you want to remove the vocals from. Go to utility and select the preset difference. Drag it to the audio track. This will remove vocals.

How To: Make your own mug shot without going to jail
At Daily Mugshots, you will be able to save your own mug shot. The first thing that you will have to do is sign up for an account. You will need a Flash Player in order to use this site. After you have your account set up, you can take a picture from your computer. You can also upload pictures that you have taken elsewhere. When you save your picture, you will have to wait until it is finished processing. When the blue bar is filled, then it will be stored in your mug show.
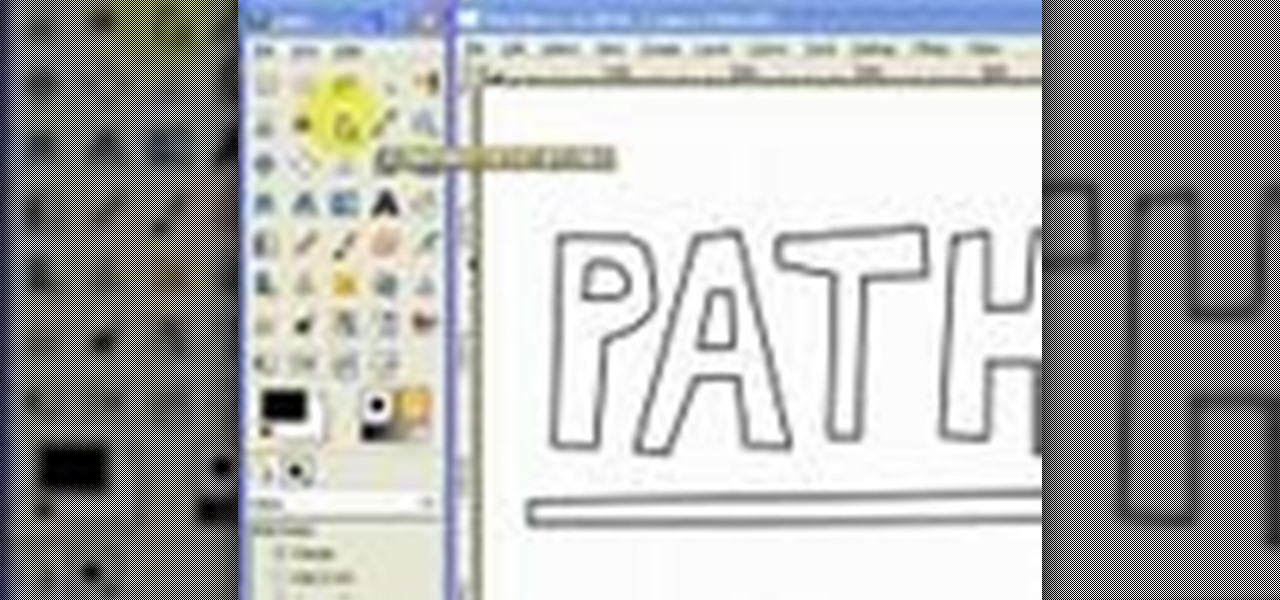
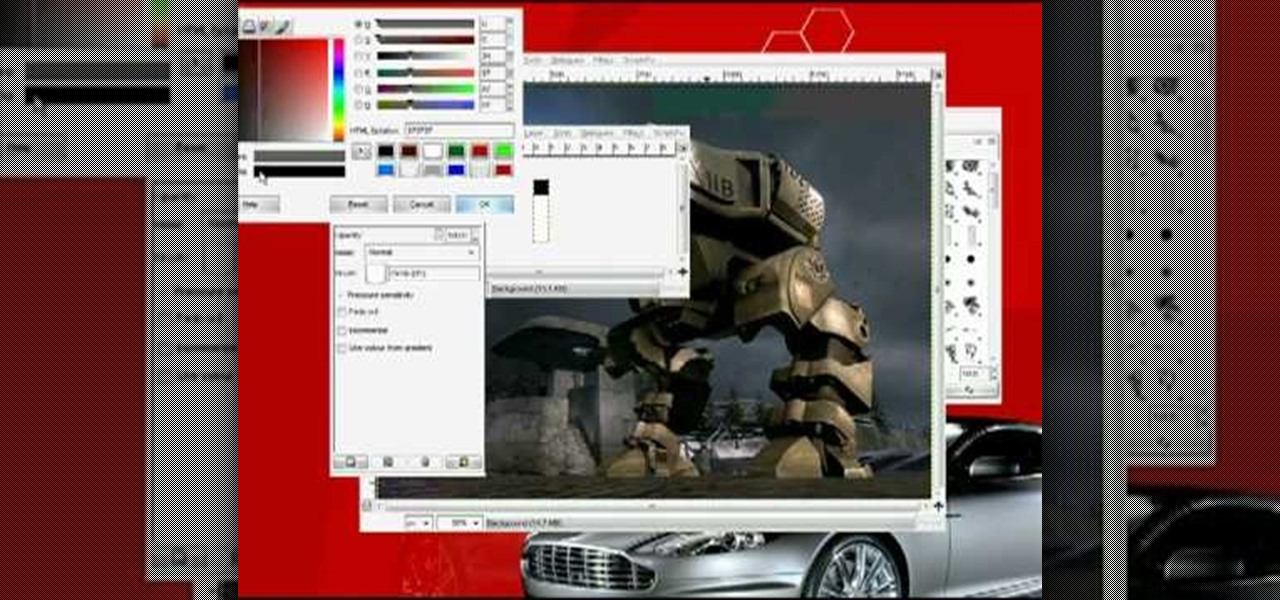
How To: Draw vector art using the path tool in GIMP
This video will introduce you to the basics of creating vector art in GIMP by teaching you to draw using the path tool.
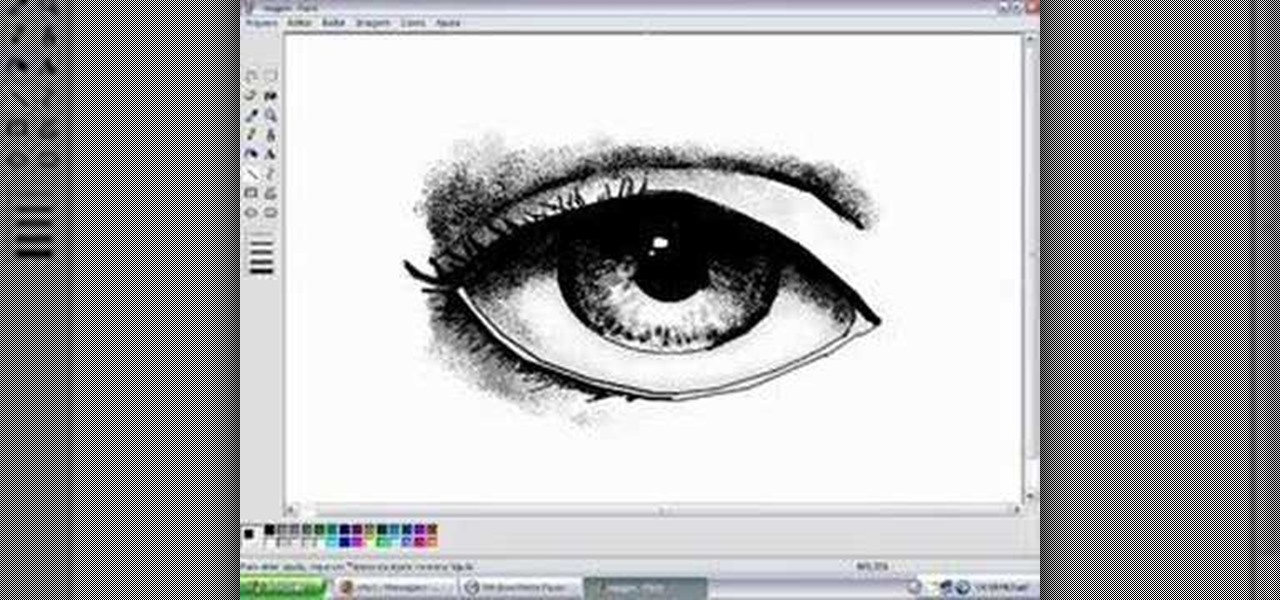
How To: Draw eyes in MS Paint
In this tutorial, we learn how to draw eyes in MS Paint. Start out by drawing the outline for the eye using a thin marker. After this, draw on a thicker line at the top of the eye and then draw on the crease of the eye above this. Now, draw in the details of the middle of the eye and start to shade in around the crease of the eye and the middle of the eye. From here, draw in the eyelashes on the top and the bottom of the eye, making them longer if they are for a woman. When finished, save thi...
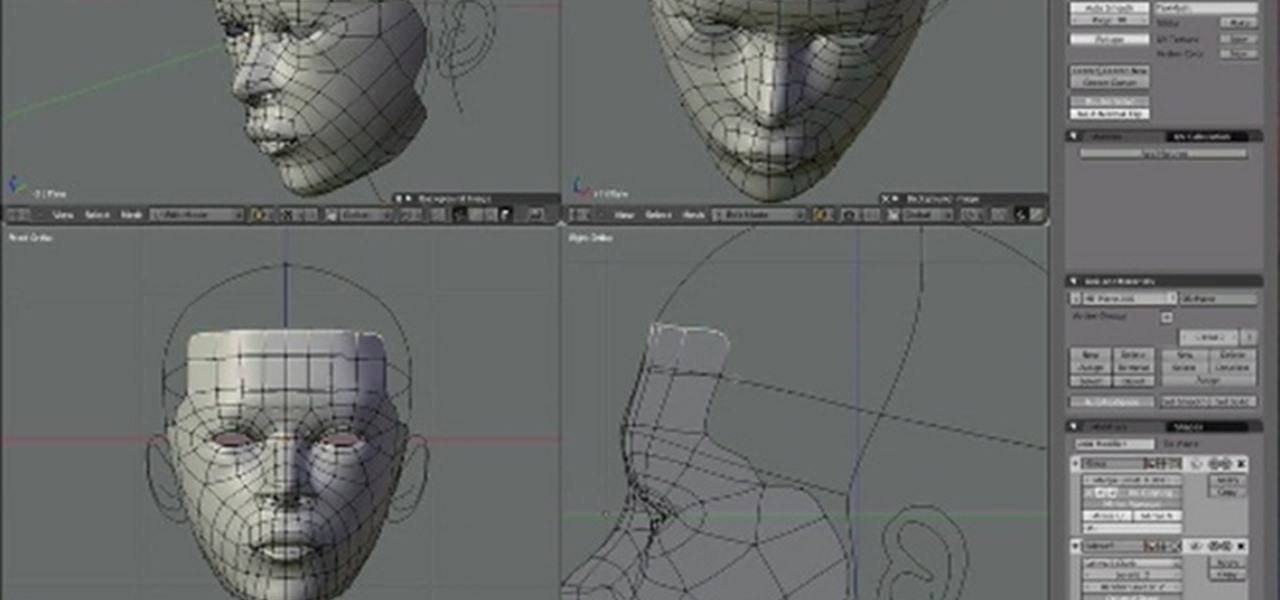
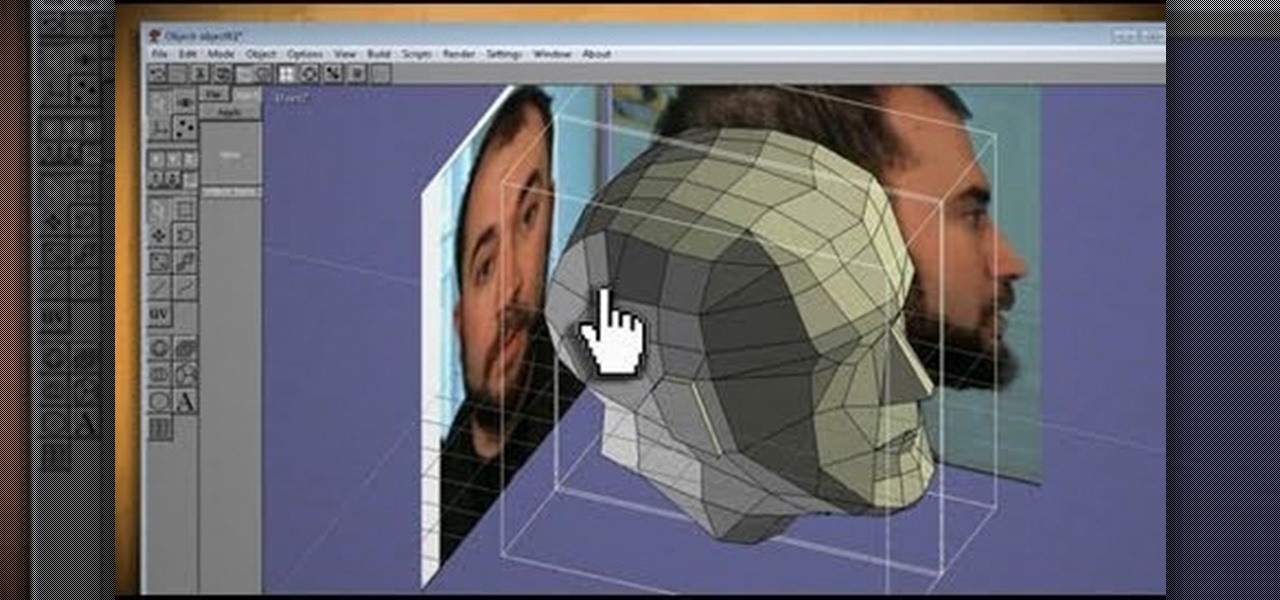
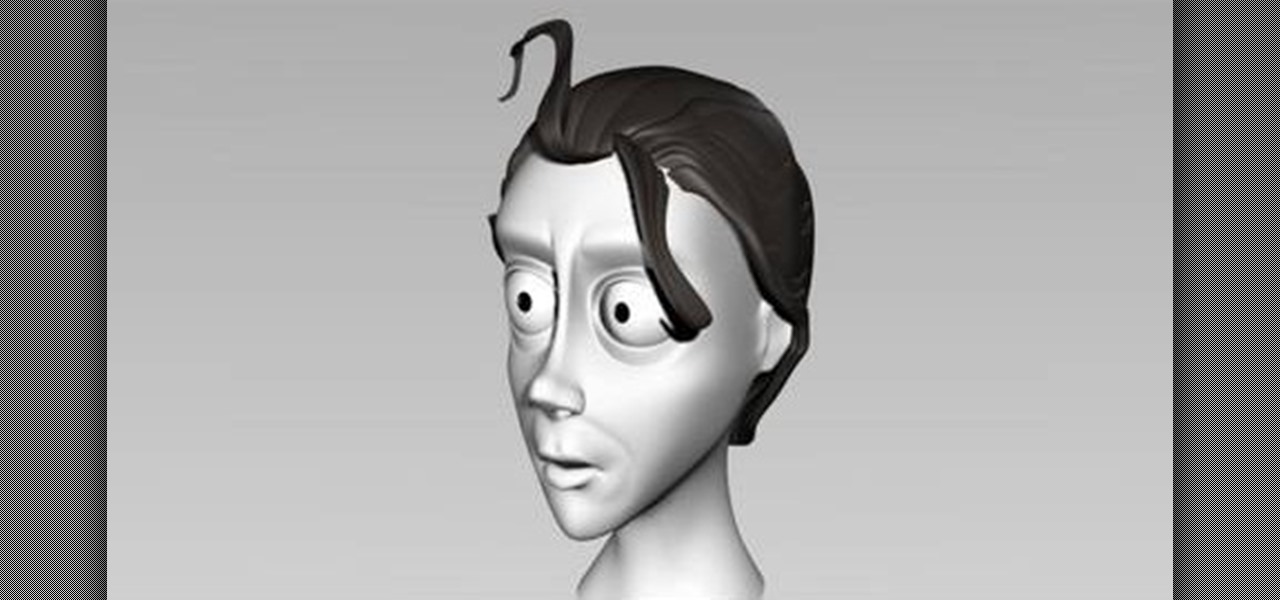
How To: Create a realistic 3D model of a human head in Blender
In this four-part tutorial, you'll learn how to create a full human head with Blender's 3D modeling tools. Whether you're new to the Blender Foundation's popular open-source 3D computer graphics application or are a seasoned digital artist merely on the lookout for new tips and tricks, you're sure to be well served by this free video software tutorial. For more information, including step-by-step instructions, and to get started modeling your own 3D heads in Blender, take a look!
How To: Fix missing grids in elevation in Revit Architecture
Have you ever had the problem where your grid lines will NOT show up in elevations?!?!?! This is of course after you have checked your VG settings and maximized 3D extents, still NOTHING! Chances are the elevation view is not perpendicular to the grid lines. In most cases this makes sense, how is Revit going to know where you want to intersect the infinite planes of the grid lines. In this Revit tutorial David Fano establishes the point of intersection as the point where the site boundary and...

How To: Resize an image in MS Paint without losing resolution
In this video, we learn how to resize an image in MS Paint without losing resolution. First, you will go to the file menu and then open. From here, open up the photo you want to resize. After this, go the 'image' section on the toolbar and then click 'stretch and skew'. From here, change the vertical and horizontal stretches until you have the size of picture that you want! Continue to play with it until it's right and then save this over again. This should only take a few minutes and will ke...

How To: Pin Applications to Task Bar Windows 8
In this Windows 8 Tutorial you will learn how to pin application to the task bar. If you work with certain programs very often it will be beneficial to pin those Windows 8 applications to your task bar in the desktop view. Once you pin an application to task bar in desktop view it will always be visible too you and with one click you will be able to launch application. Thank you for viewing our Windows 8 tutorials. If you need help with a certain area of Windows 8 and would like us to make a ...
How To: Clone your head, face or anything, then print in 3D, with Anim8or & Pepakura
What could you do with two of you? Or, two cats, or two cars, or two of anything? Cloning, it's the way of the future and this tutorial shows you how to clone and print a 3D model of virtually anything. Using Anim8or and Pepakura Designer you can model your face and print it up to create a 3D mask. Two for the road I say! (Or would that be four?)
How To: Use Raw Therapee with GIMP
In this video, we learn how to use Raw Therapee with Gimp. First, you need to go online to Raw Therapee, then download and install Raw Therapee. Once you have this, open it up and familiarize yourself with the layout of the software and where the different tools are at. Next, change your preferences and pick your settings throughout the different folders. Next, find GIMP through the program folders as your installation directory. Now, it will export your images to GIMP automatically. This way...
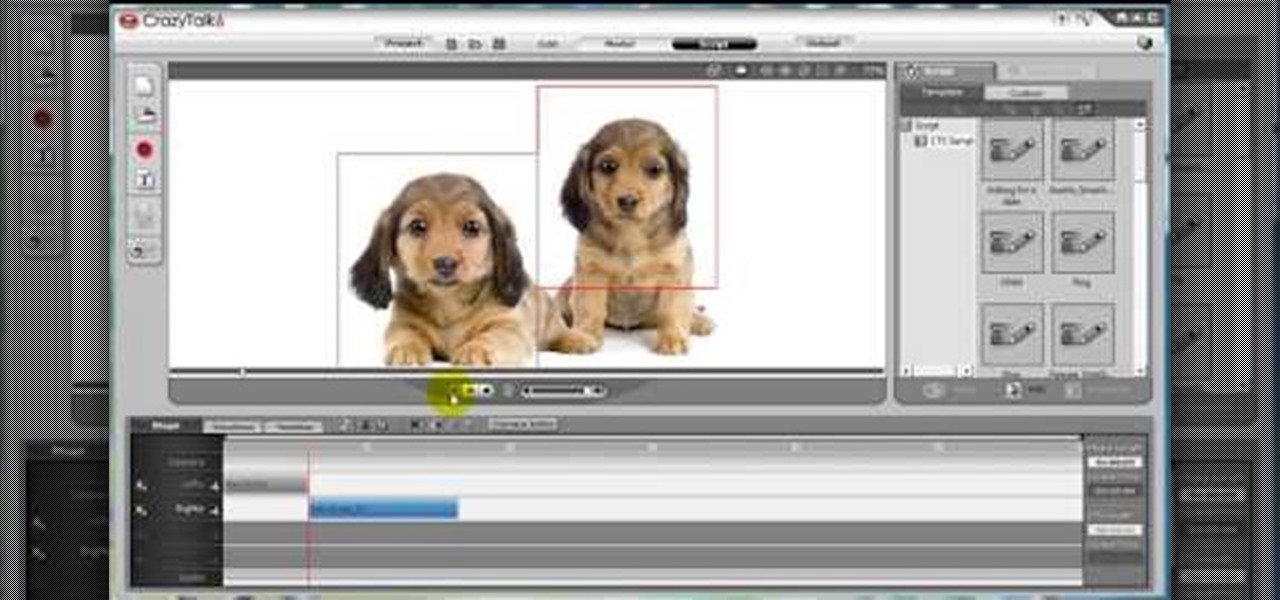
How To: Make animated pet dialogue using Crazy Talk software
In this video, we learn how to make an animated dialogue in CrazyTalk6. Once you are in CrazyTalk6, face fit your character then click on "script". You can re-name your characters as you wish. Once you have their names picked out, you can create a script for them. Press the red record button and record what you want the character to say and press "load". Then, choose what you want the facial features to look like. Load another script for the other animal and once you press play, you can see b...
How To: Create your own headlines in GIMP
Hulldo teaches you how to create your own headlines in GIMP. You start off with a new file and paint that a light brown. Make a selection on the file and create a new layer on top. Color that layer black and add Gaussian blur. Put that layer beneath so it will make a shadow on your selection. Create the start of a gradient or simply a Grey layer on the bottom of the headline. Then add your text with black color. You can duplicate these layers, reside the selection and change the text. You are...

How To: Edit a text in SWISH Max
This tutorial shows you how to edit text on a Flash based website using SWISH Max. Edit a text in SWISH Max.
How To: Create an LCD screen effect in GIMP
This tutorial teaches you how to make an image look like an LCD screen in GIMP. He is using Gimp version 2.4.4

How To: Make credits with VideoTagger
So you just finish making your movie, but don't forget the credits...This video tutorial will show you how to make credits with VideoTagger. You can even change fonts, textures, and colors all with VideoTagger. Make credits with VideoTagger.
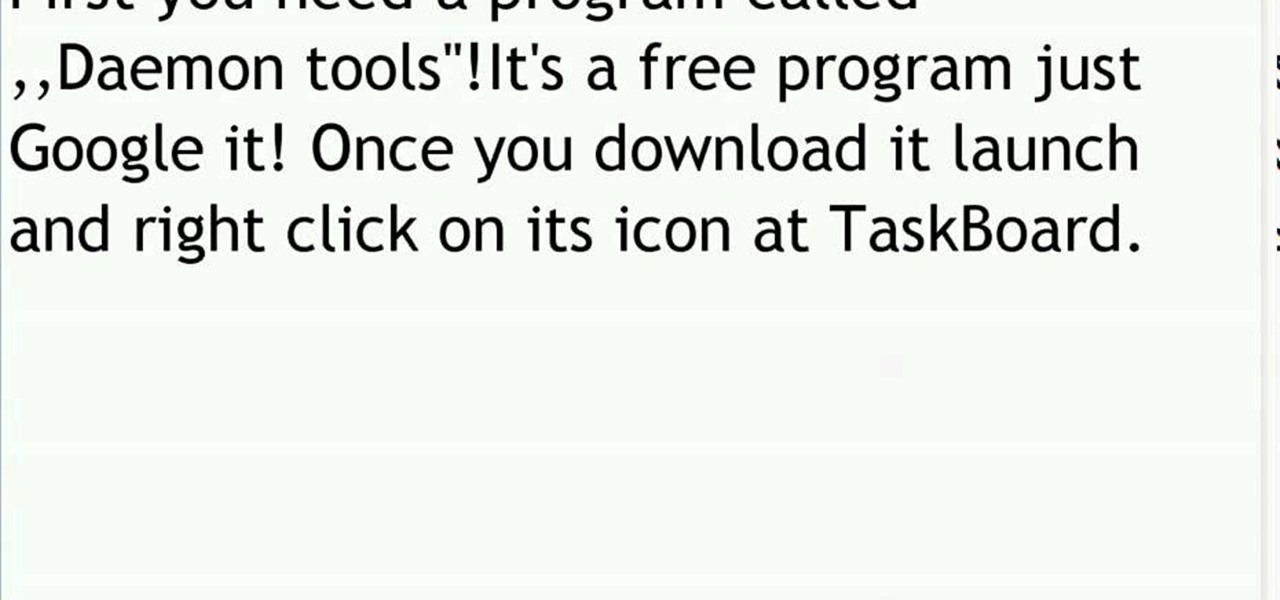
How To: Mount ISO, BIN, or CUE files using Daemon Tools
In this video tutorial, you will learn how to mount and unmount an .ISO, .bin and .cue image with daemon tools. This is useful because when you download a game, movie or an application, you usually get an .ISO, .bin or .cue file.
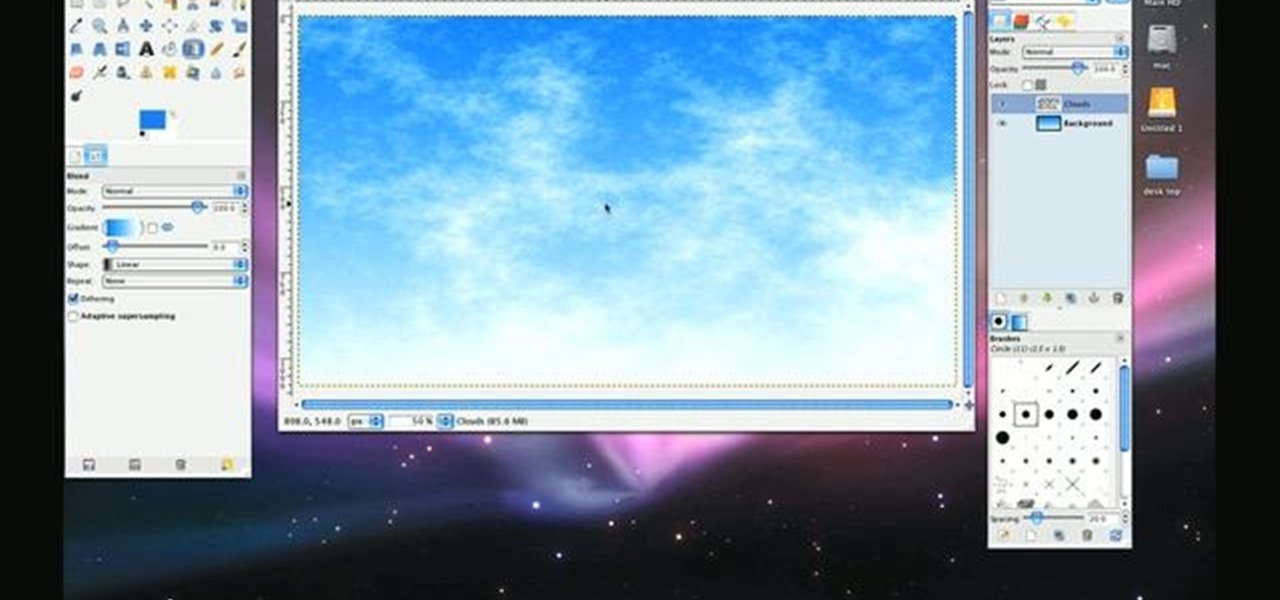
How To: Generate realistic clouds with the GIMP image editor
In need of a sunny, blue sky? Generate one in GIMP! Whether you're new to the GNU Image Manipulation Program, GNU's popular free graphics editor, or a seasoned designer just looking to pick up a few new tips and tricks, you're certain to enjoy this free video software tutorial. For more information, including detailed, step-by-step instructions, and to get started making realistic clouds in GIMP yourself, take a look.
How To: See Through Clothes with Gimp 2.6
If you can't seem to find any photos of naked people on the internet, don't fret, this how to will show you how to "see through" clothing using some simple techniques with Gimp 2.6 photo editor. Gimp is like Adobe Photoshop without the heavy price tag. Tight, white clothing works best for this trick, so keep that in mind. Watch the video and get one step closer to seeing someone naked. Right on your own computer! See through clothes with Gimp 2.6.
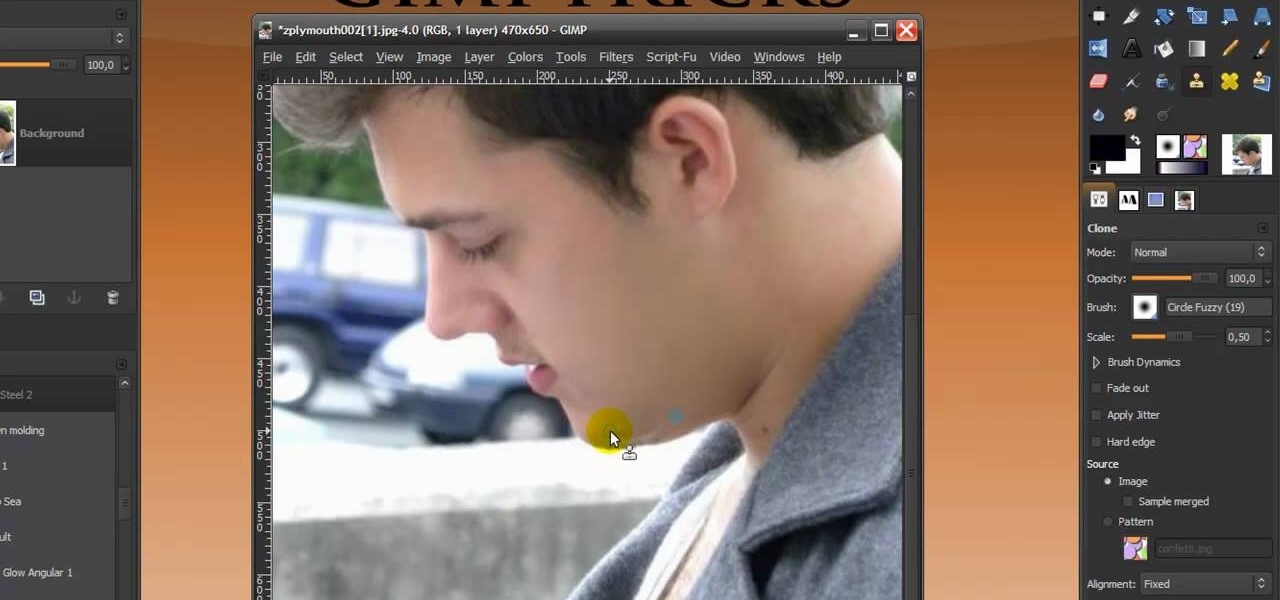
How To: Give someone a shave in GIMP
In this Software video you will see how to give someone a shave in GIMP. Learn spot removal, skin smoothening and a makeover or removing a 1 day beard. This is done using the Clone and the Healing tool. To use the Clone tool, select the tool from the right hand panel. Then to select the source skin color, you have to hold ctrl key down and click. Now when you apply it to the area you will get the same shade of the source color. So, you will need to select an area very close to the spot you ar...
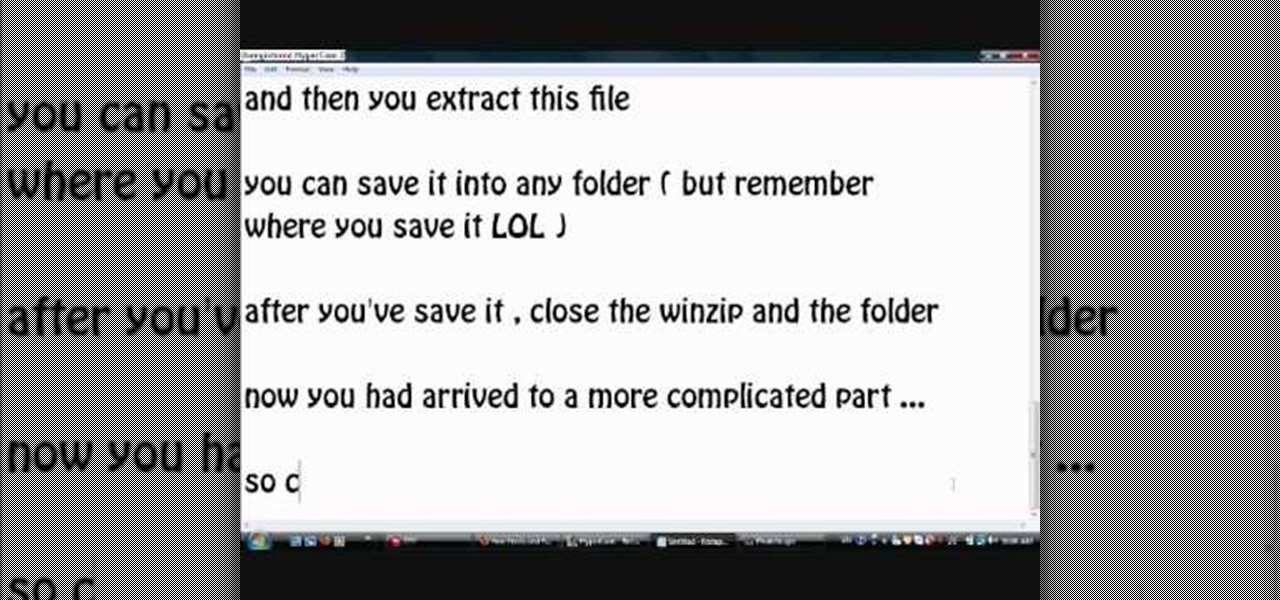
How To: Install additional fonts in Photoscape
Photoscape is a piece of free, photo editing software to use instead of more costly programs such as Photoshop. The program is pretty cool but you may want to install more fonts than what it comes with. If so, check out this video and you'll find out how to get it done. You'll need a zip program like winzip or winrar and you'll of course need Photoscape which you can get here.
How To: Use the camera fly mode tool in Blender
See how to work with Blender's Camera Fly Mode tool. The tool is a great way to help navigate your 3D scene, and also for camera placement (or any object set to be a "camera", for example a Spotlight). Whether you're new to the Blender Foundation's popular open-source 3D computer graphics application or are a seasoned digital artist merely on the lookout for new tips and tricks, you're sure to be well served by this free video software tutorial from the folks at CG Cookie. For more informatio...
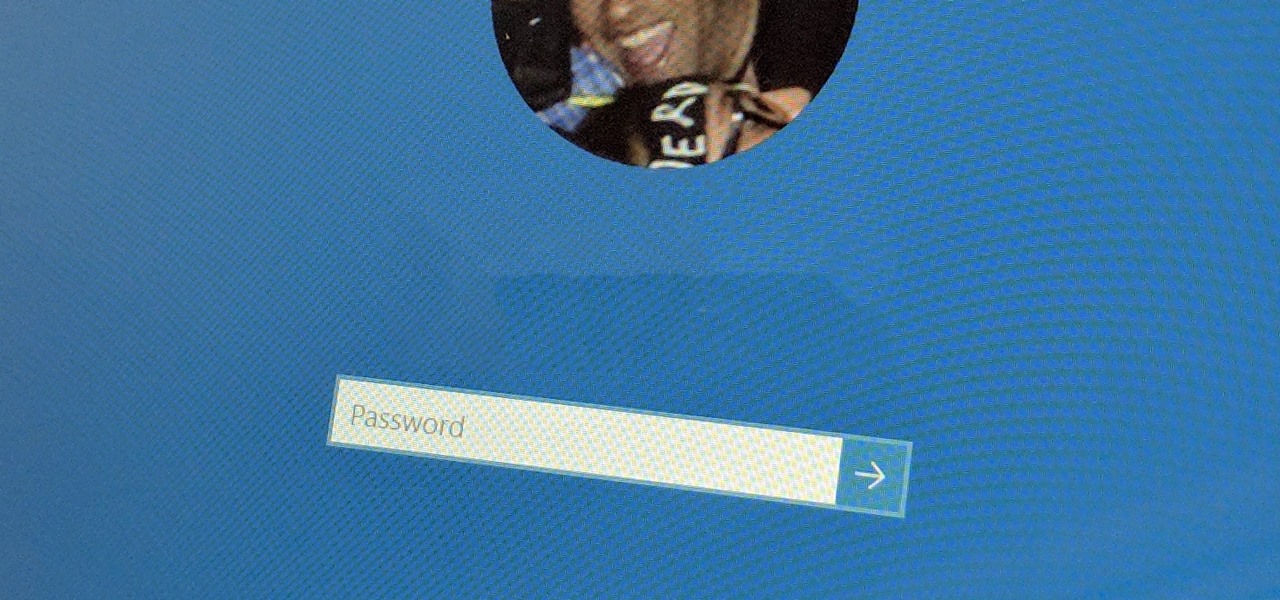
How To: Bypass the Password Login Screen on Windows 8
It's good to password-protect your PC to make sure that your personal files, folders, and important documents are safe and can't be modified without your permission. Though, entering the password all of the time before using your computer might frustrate you.

How To: Create a login form using MS Access 2007
If you want to password restrict some of your data, or just want to know who is doing what in Microsoft Access 2007, you will want to set up a login form for MS Access 2007. This is an easy procedure, and you can create one yourself with just a basic understanding of the structure for MS Access. Watch this video, and Uncle Gizmo will show you how to do a login form and several other forms for MS Access.

How To: Add fonts to Photoscape
Photoscape is a pretty sweet, free photo editing software. However, it comes with a limited number of fonts installed and you'll likely want to add more yourself. This how to video shows you step by step what to do to get additional fonts and then how to install them in Photoscape. This is an excellent video designed to expand a great piece of software by letting you add more fonts. You'll need an unzip prog like winzip or winrar to help you get it done.
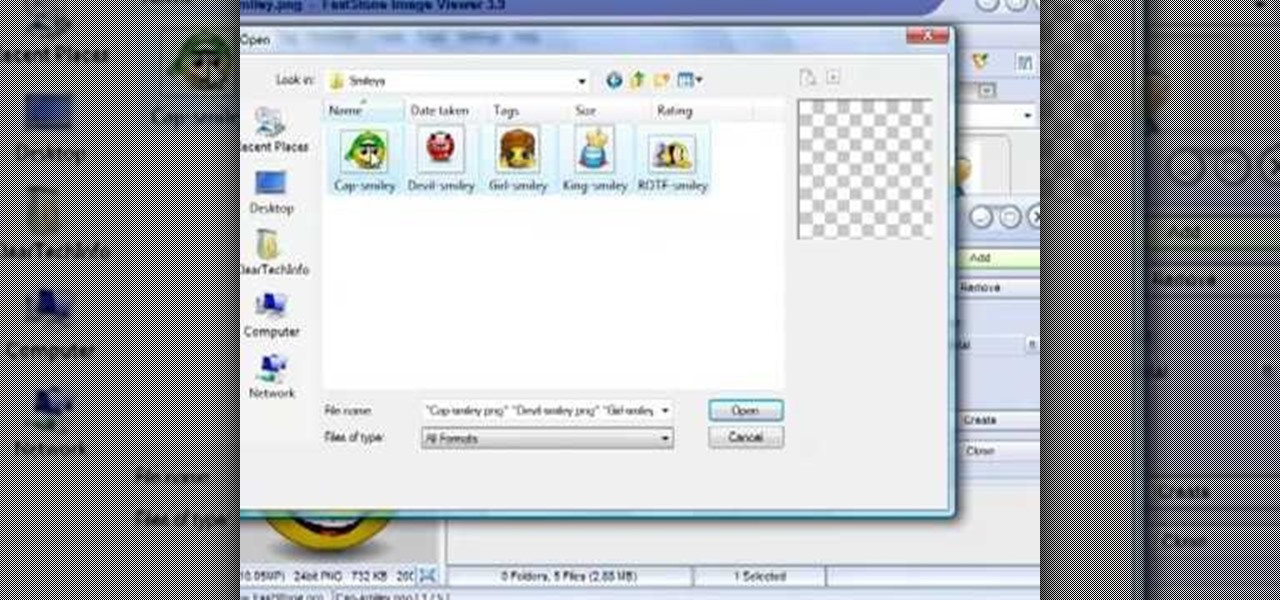
How To: Make an image strip using FastStone Image Viewer
In this tutorial, we learn how to make an image strip using FastStone Image Viewer. First, open up the images that you want to have inside the strip. Then, open up Fastone Image viewer and find the location of the images. From here, go to "create", then "image strip builder". This will bring up the builder window where you can add in the images you want to see on the strip. When finished, click on the "create" button. Now, the strip will come up on your computer in a new image and you will be...
How To: Sculpt claymation-style 3D hair using the Blender software
When using the Blender software on your PC, you're able to employ a "zbrush technique," which is using curves and your sculpt tool to create a mesh hair effect. If you're looking for a way to give your figures claymation style hair, this is how you do it!
How To: Create an ISO image with Ashampoo Burning Studio 6
In this video tutorial, viewers learn how to create an ISO image. Users will need to download the program, Ashampoo Burning Studio 6. Begin by going to the Google search engine and search for the program. Select the result from download.com. Click on Download Now and save the file. Double-click on the file and follow the instructions to install it. Then open the program and select Create/Burn Disc Images. Select the type of disc image that you would like. Then click on Add and select the file...
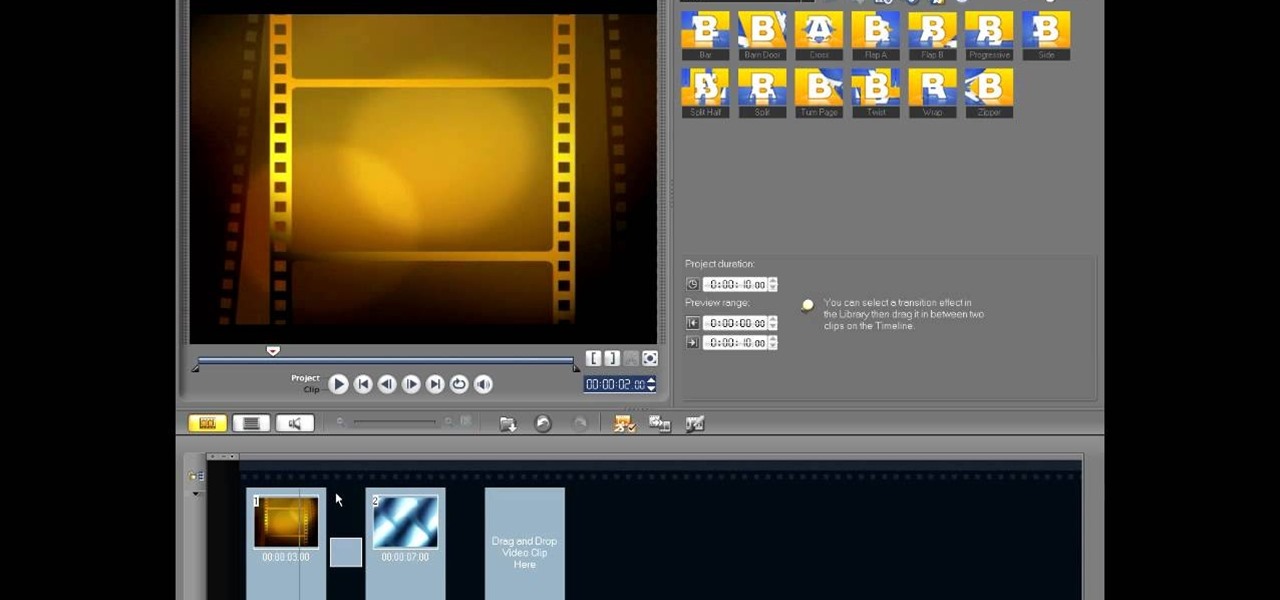
How To: Edit in storyboard mode in Corel VideoStudio
In this video tutorial, viewers learn how to edit in storyboard mode in Corel Video Studio. The storyboard mode is an alternative view for the time line. To switch to storyboard mode, click on the film strip icon above the time line. Storyboard arranges your project by element. To add a new element or transition in storyboard mode, click on the Edit tab and select the element or transition that you want by dragging it to the storyboard. This video will benefit those viewers who use Corel Vide...
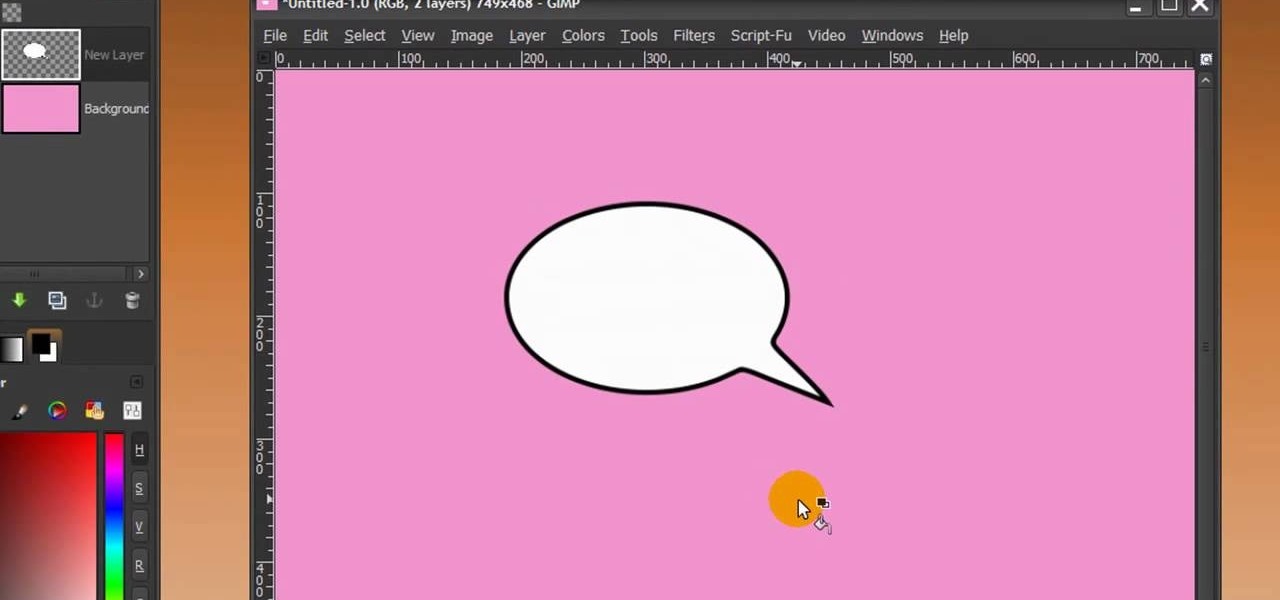
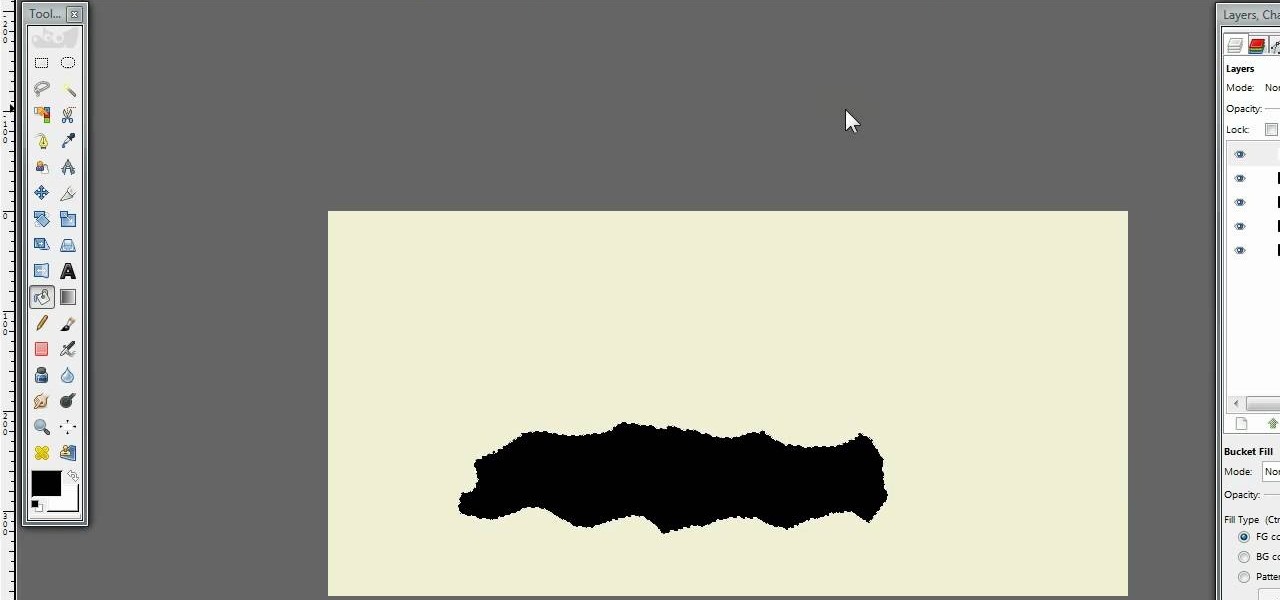
How To: Make a speech bubble in GIMP
First of all open any image and create a new ‘layer’ and add it to your image. Click on the transparency and then click ‘ok’. Now from the right menu bar choose the ‘elliptical’ icon to make a round balloon. Now select the 'free select tool' and select ‘mode’ to 'add to current selection' and then draw a triangle with the base inside the previous balloon and the pointed end outside the balloon. Now select the 'bucket fill' tool and make sure your ‘background’ color is selected as white and th...
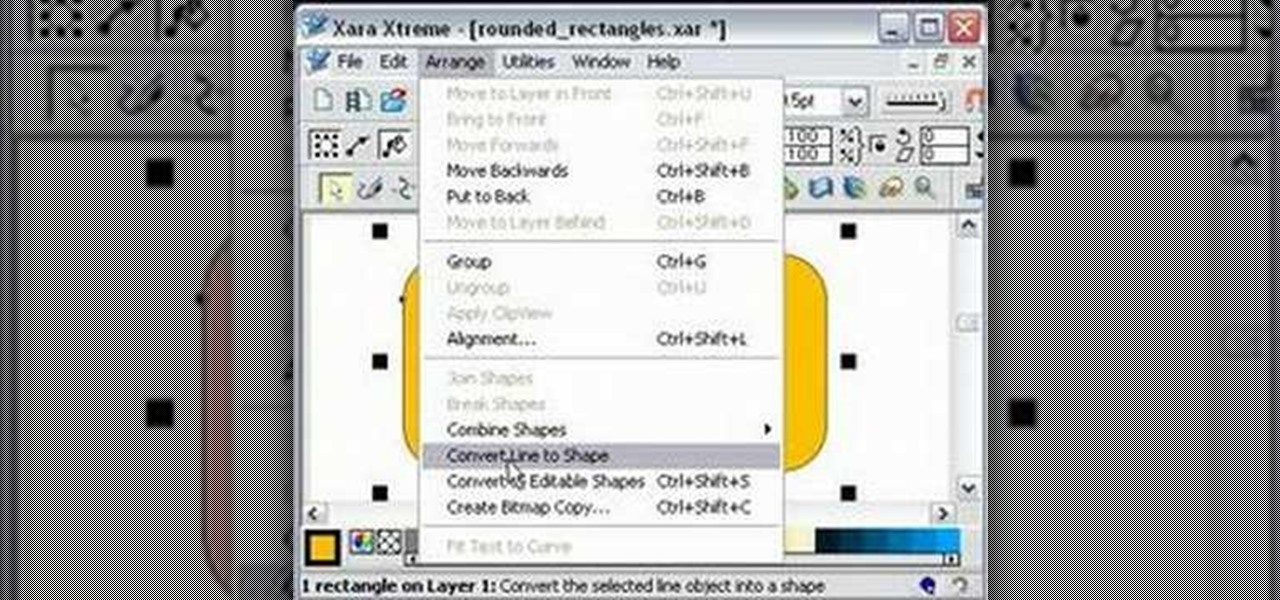
How To: Create rounded-corner rectangles in Xara Xtreme
One must have often wondered how to create rectangles with smooth rounded corners. Open Xara Xtreme and create a rectangle on the stage. To change it to rounded corners, click on 'curved corners'. Then one can edit how much curve is required on the rectangle. If we scale the rectangle, then it will lose the curve path. So it should be converted to 'editable shapes'. This will maintain the curves, even if scaled from one angle. This will be helpful to create those party fliers.
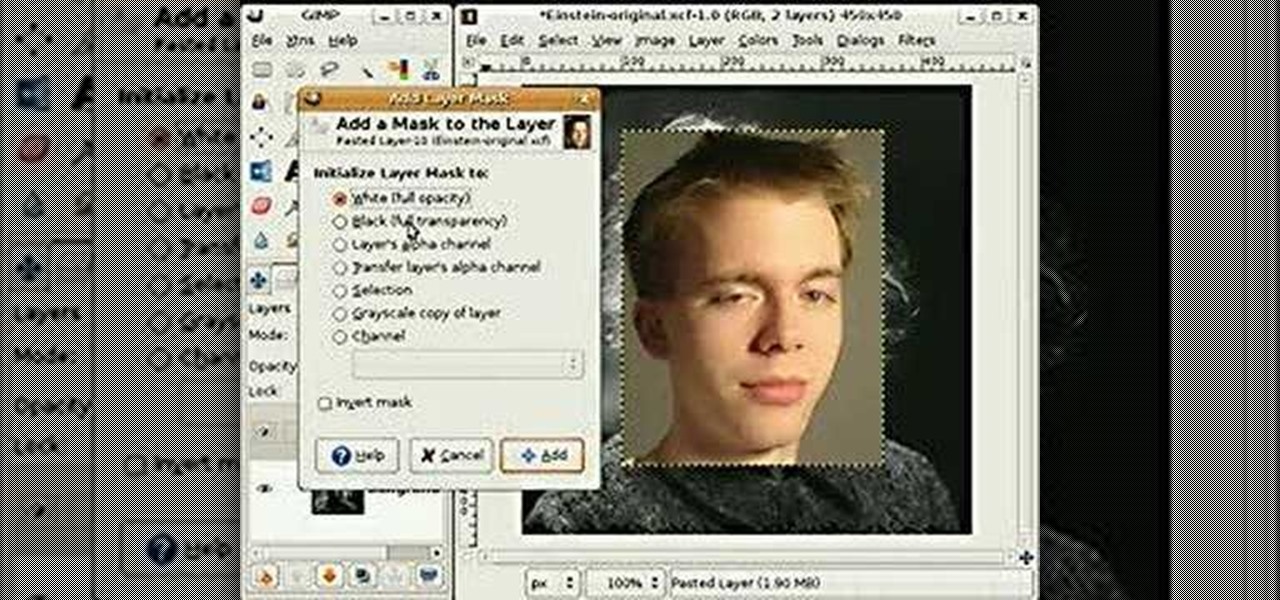
How To: Replace faces in photos using GIMP
This video shows how to use some basic image editing techniques to replace the face in an image with another face.

How To: Download Videos with One Click in Freemake Video Downloader
Looking for the fastest and easiest way to download videos from YouTube, Facebook, MTV, Vevo, and other sites? If so, read this guide. Freemake Video Downloader 2.1 offers a brand new mode to get web videos offline in a single click!

How To: Replicate the effect on the album cover for Drake'sThank Me Later
A fan of Drake's music, Thank Me Later or just like the way the album art was done? This tutorial shows you how to go step by step to create the same kind of effect using the free photo editing software GIMP.

How To: Create amazing 3D text in GIMP
In this tutorial, we learn how to create amazing 3D text in GIMP. First, start a new image with the width and height that you want. From here, select the text editor and then type in your text. After this, change the font to what you want and then change the size and color as well. From here, you will duplicate the layer and then go to layer, and then filter. Select the map button and then map the object. Select the text and then show the preview to make sure it's what you want. Change the or...
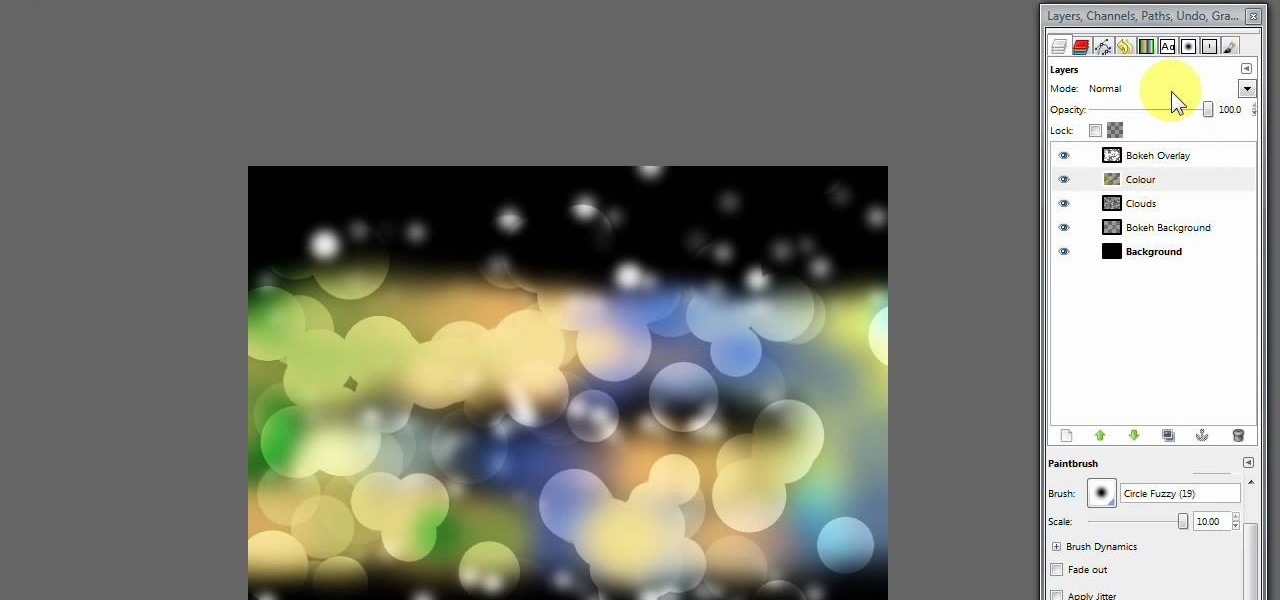
How To: Create a modern bokeh effect in GIMP
In this video, we learn how to create a modern bokeh effect in GIMP. First, start a new image and then change it to the size that you want. From here, click on the paint can and then fill your box up with a color. Then, create a new layer and name it "bokeh background". Click on this layer and then use the paintbrush tool to paint a small brush with color onto it. Start to paint on small dots and you will see that there are small tiny star like dots that start to appear. Then, fade these out ...

How To: Make stencils in GIMP
In this tutorial, we learn how to make stencils in GIMP. Start with heads or faces if you are new to this. Then, use the rectangle tool to select the head. Then, go to image and fir canvas to selection. Now, remove the background by using the background tool. Once finished, go to colors, then threshold. The image should turn black and white. Turn the dial to the right, then turn it to the left to make it lighter and darker. Find the spot to where it shows detail but it's not distorted, then h...
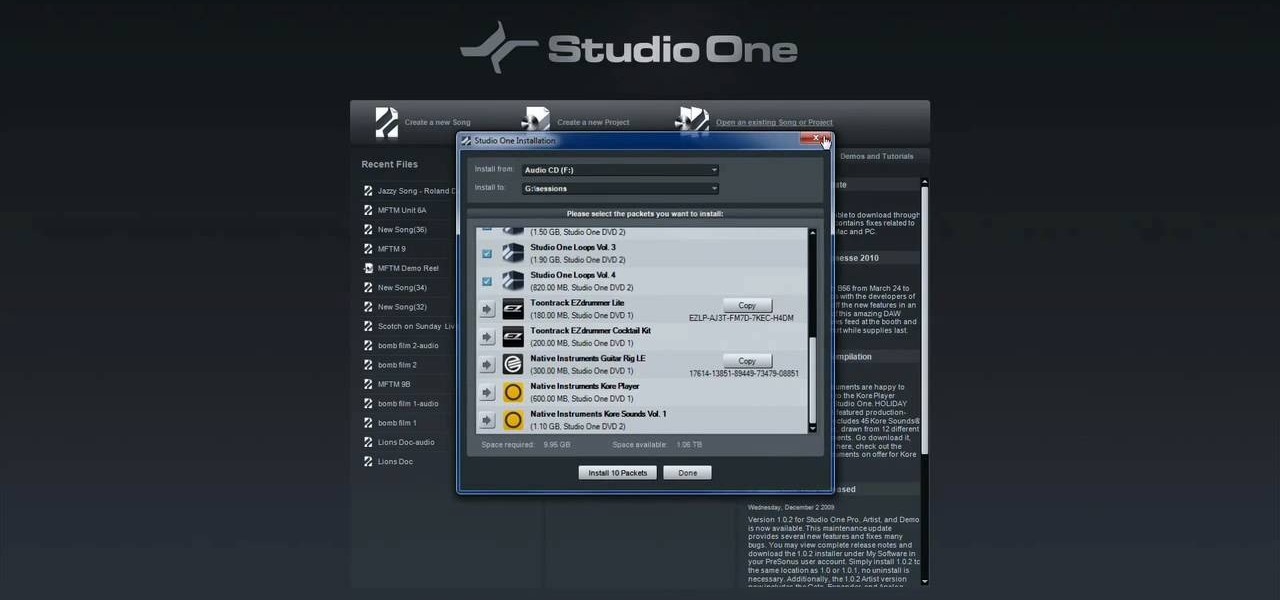
How To: Register & activate PreSonus Studio One online or offline
In this video tutorial, we learn how to register and activate Studio One either over the Internet or offline. Whether you're new to PreSonus' DAW or new to digital recording more generally, you're sure to find much to take away from this free video software tutorial. Take a look.
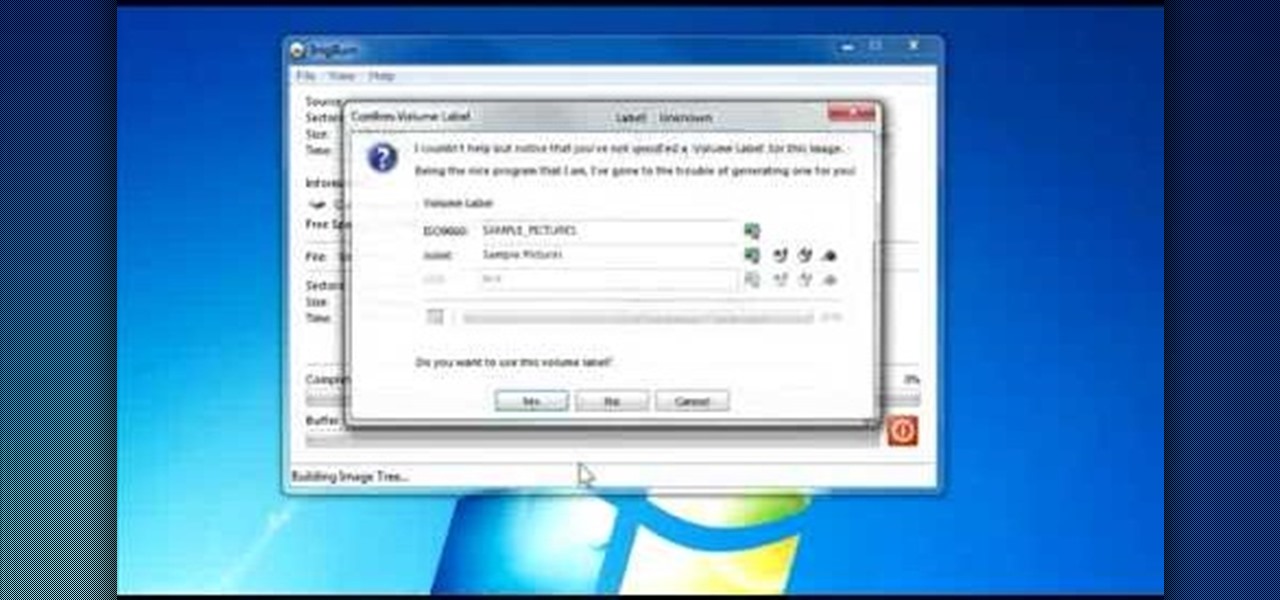
How To: Create a bootable CD with ImgBurn
Download the software from Imgburn. Choose mode, build, advanced, bootable disk. Go to allbootdisk to get a bootable image of your operating system. Choose from Windows 95 through Vista. Download the diskette image. Name and save to desktop. Choose volume and label. Click ok. Make the output burn to image file. Name the file and save it to the desktop. Download Sun Virtualbox. Test the image by choosing settings, storage, add device. Choose media manager. Select make primary slave. After test...
Next Page
Prev Page