


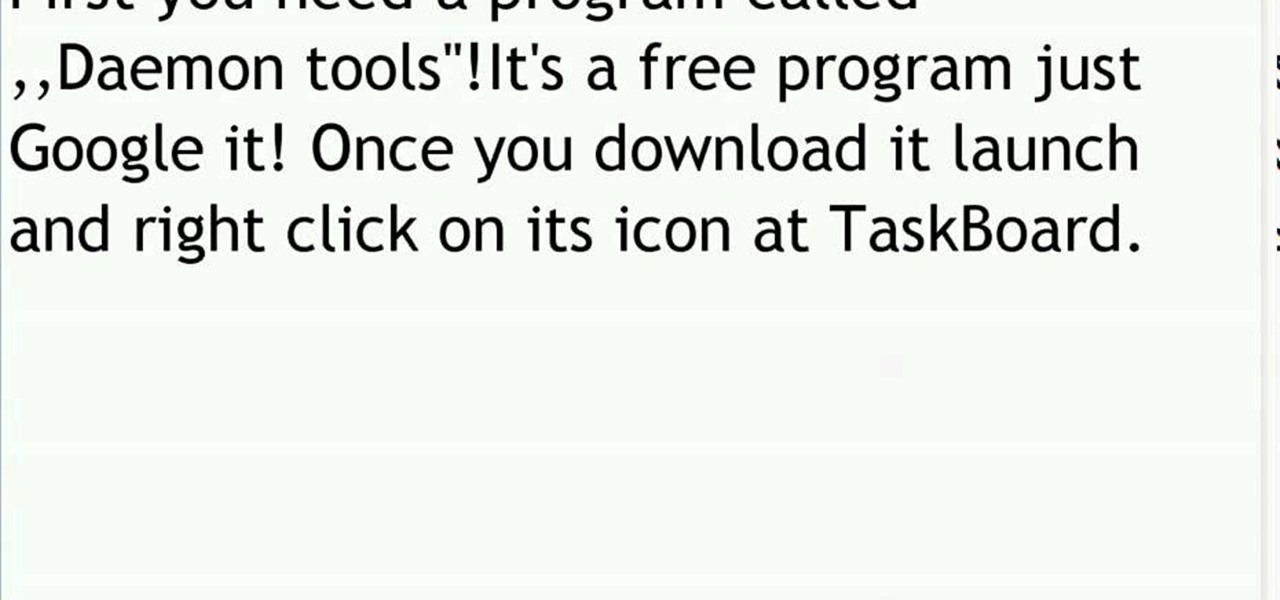
How To: Mount ISO, BIN, or CUE files using Daemon Tools
In this video tutorial, you will learn how to mount and unmount an .ISO, .bin and .cue image with daemon tools. This is useful because when you download a game, movie or an application, you usually get an .ISO, .bin or .cue file.
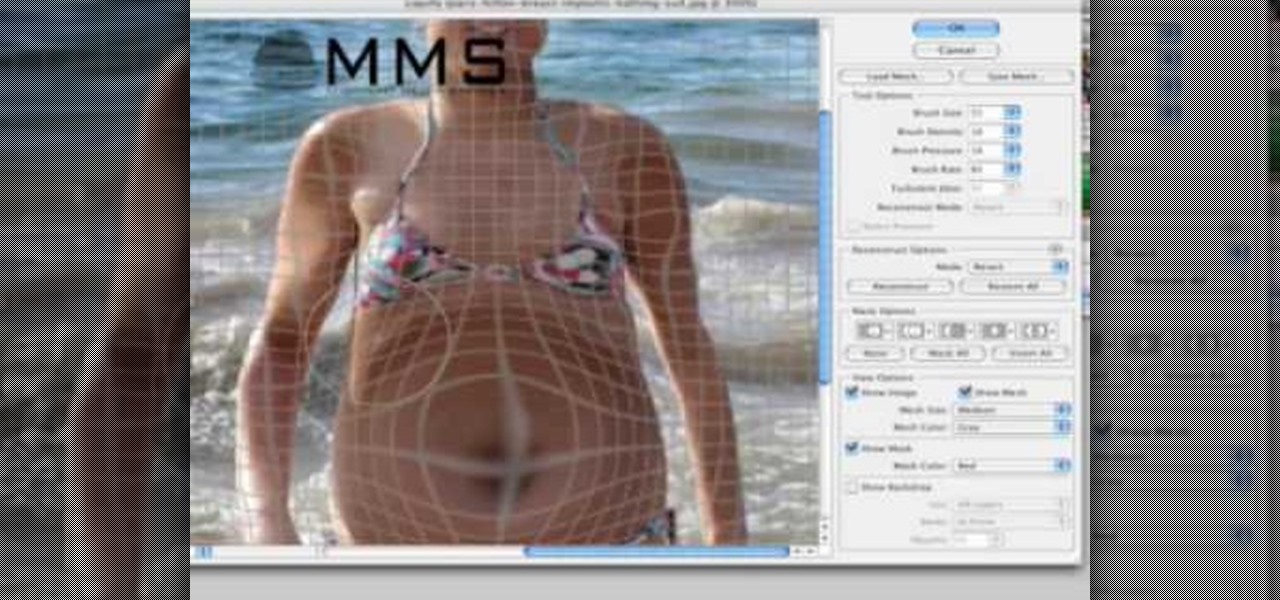
How To: Make someone look fat with Photoshop
Well, usually people are looking to go from fat to thin, but sometimes it's fun to see what a person would look like if they were on a full Twinkie diet. Well, this tutorial shows how to use the liquify tool in Adobe Photoshop to add weight to someone to make them look pudgey, overyweight, fat or even downright obese. The tool is easy to use and the video shows clearly how to turn that beach babe into a Jenny Craig "before" photo! Check it out and YOU can make people look fat in photos.
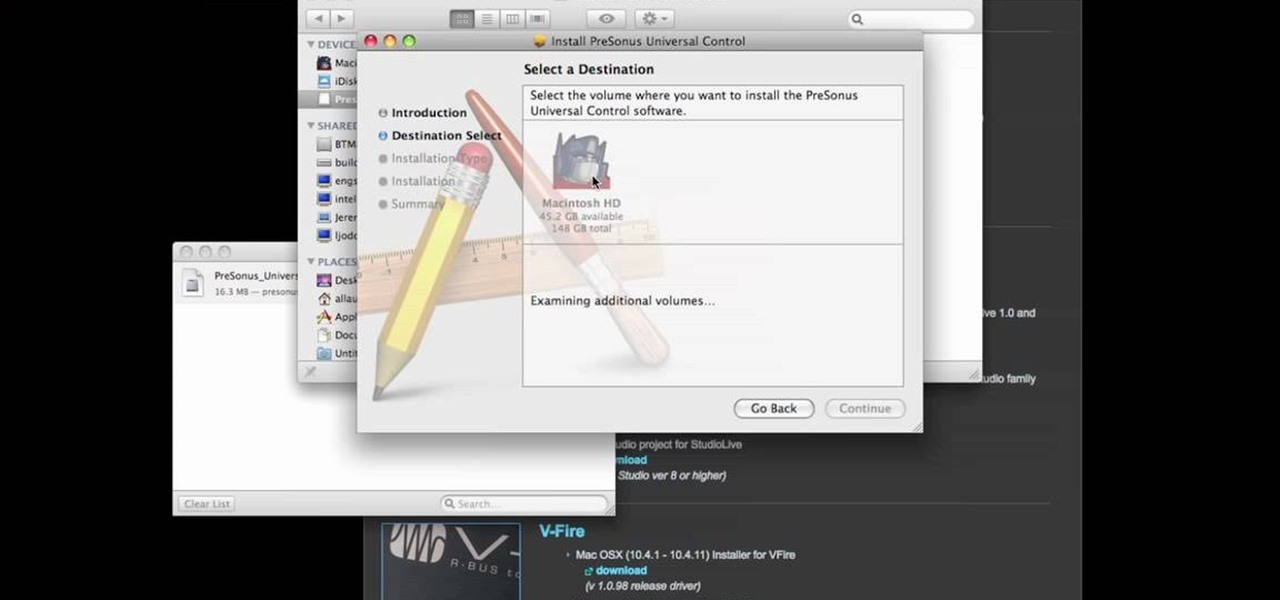
How To: Download and install PreSonus Virtual StudioLive
In this video tutorial, we learn how to download PreSonus Virtual StudioLive from the PreSonus website. Whether you're new to PreSonus' DAW or new to digital recording more generally, you're sure to find much to take away from this free video software tutorial. Take a look.
How To: Save your project in Pinnacle Studio
This tutorial explains how to save your work in Pinnacle Studio. The first step is to go to "File". Next is saving projects by using the drop down menu from the top left corner of the program. When you save your project it does not mean that all the video files will be saved. In fact, all the original files have to be stored in the exact same place so this will work. To save your new project you have to go to movie and make and output format like Vdix or VCL.
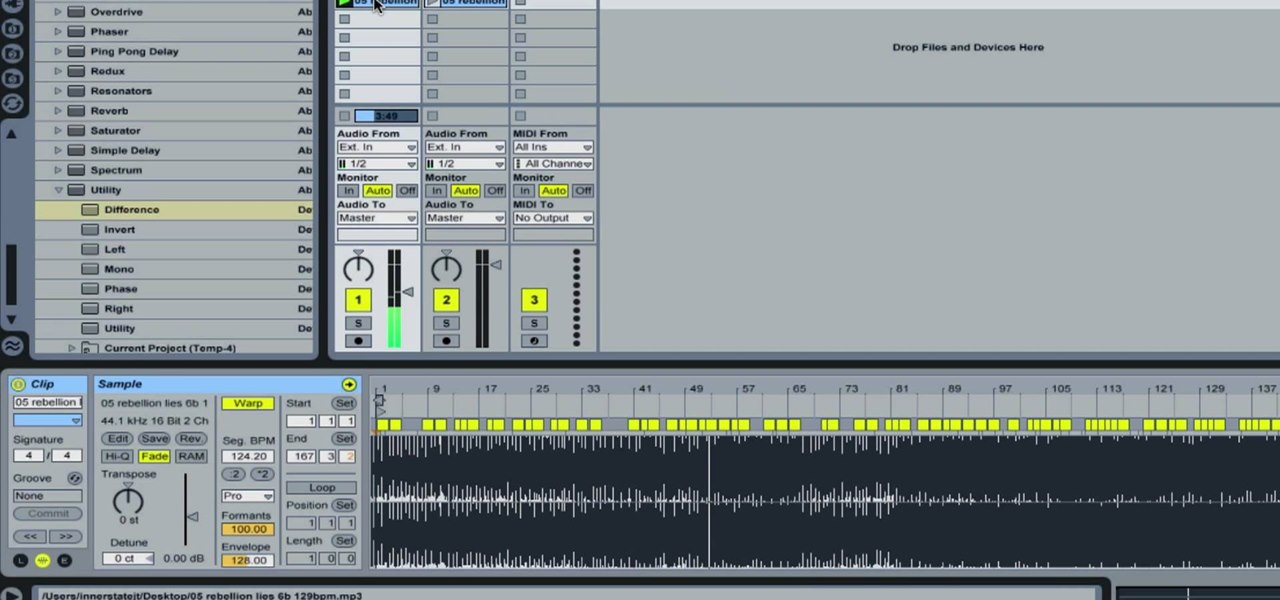
How To: Remove Vocals from a Song in Ableton Live
In this how-to video, you will learn how to remove the vocals on songs using Ableton. First, open the tracks you want to remove the vocals from. Go to utility and select the preset difference. Drag it to the audio track. This will remove vocals.
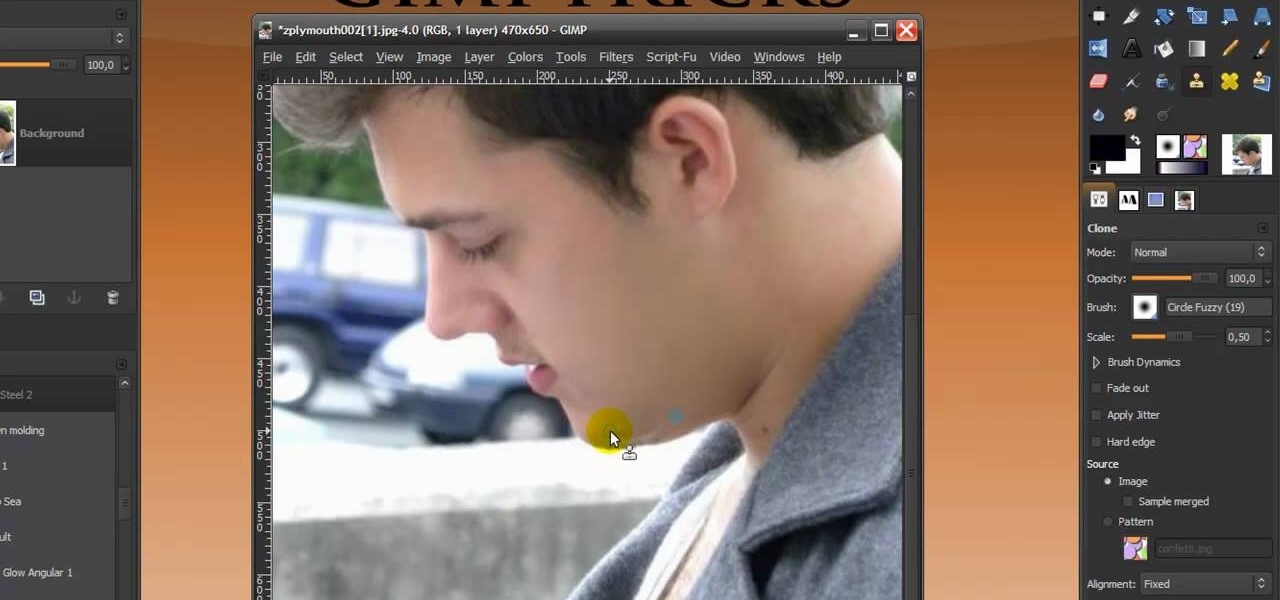
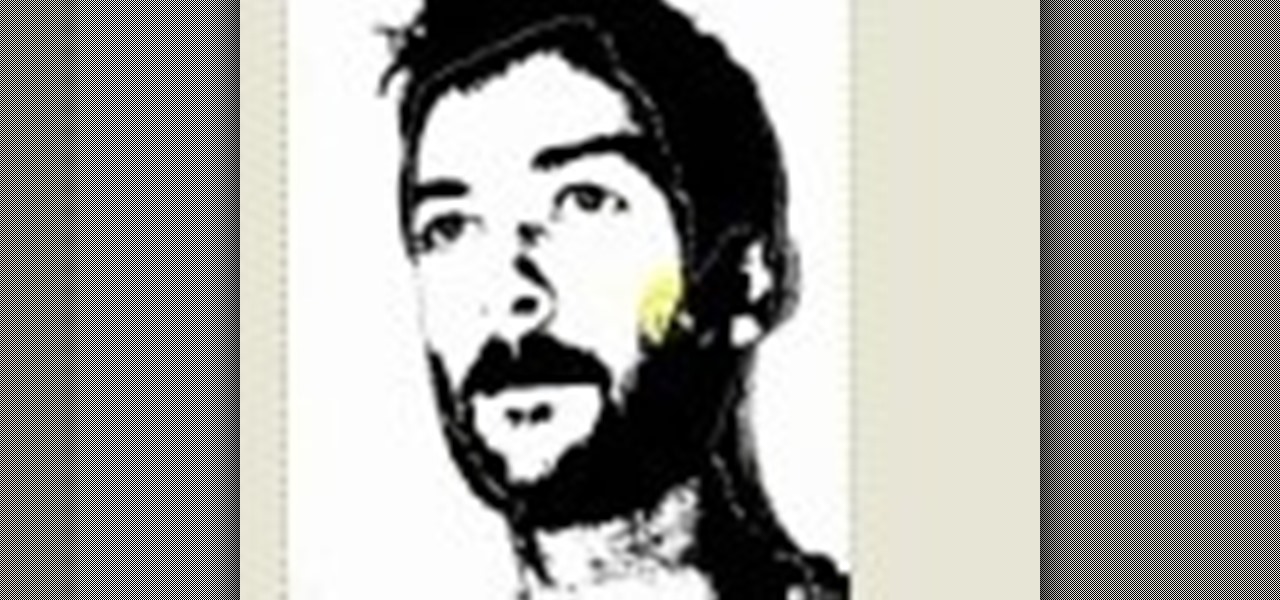
How To: Give someone a shave in GIMP
In this Software video you will see how to give someone a shave in GIMP. Learn spot removal, skin smoothening and a makeover or removing a 1 day beard. This is done using the Clone and the Healing tool. To use the Clone tool, select the tool from the right hand panel. Then to select the source skin color, you have to hold ctrl key down and click. Now when you apply it to the area you will get the same shade of the source color. So, you will need to select an area very close to the spot you ar...

How To: Control the Axiom 61 Keyboard MIDI with Enigma
In this tutorial, Jeff Dykhouse demonstrates how to use the powerful Enigma Editing Software to assign MIDI message to all the different controllers that the Axiom 61 keyboard has at its disposal. Jeff covers: Downloading Presets, Creating User Banks and Loading and Creating Presets. You can use the Axiom 61 with Reason, Ableton Live, Pro Tools and even GarageBand.
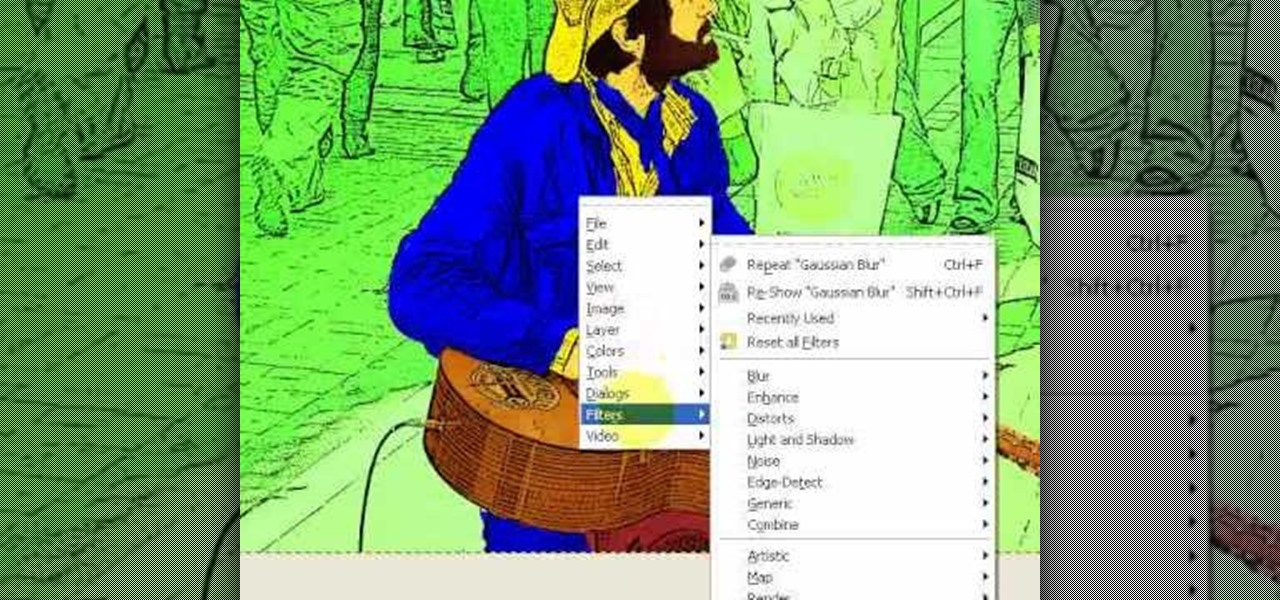
How To: Create Che Guevara Pop art in GIMP
This is a variation on the Pop Art tutorial, looking specifically at how to make a Che Guevara inspired image using GIMP image editing software.

How To: See Through Clothes with Gimp 2.6
If you can't seem to find any photos of naked people on the internet, don't fret, this how to will show you how to "see through" clothing using some simple techniques with Gimp 2.6 photo editor. Gimp is like Adobe Photoshop without the heavy price tag. Tight, white clothing works best for this trick, so keep that in mind. Watch the video and get one step closer to seeing someone naked. Right on your own computer! See through clothes with Gimp 2.6.
How To: Get the CD Product Key or Serial Off of Any CD
This will allow you to find the CD product key or serial if you have lost it so you dont have to buy another CD.

How To: Create a custom cursor in RealWorld Cursor Editor
This tutorial teaches you how to create an animated cursor for Windows. The cursor is created with RealWorld Cursor Editor 2007.1 with 3D module installed.
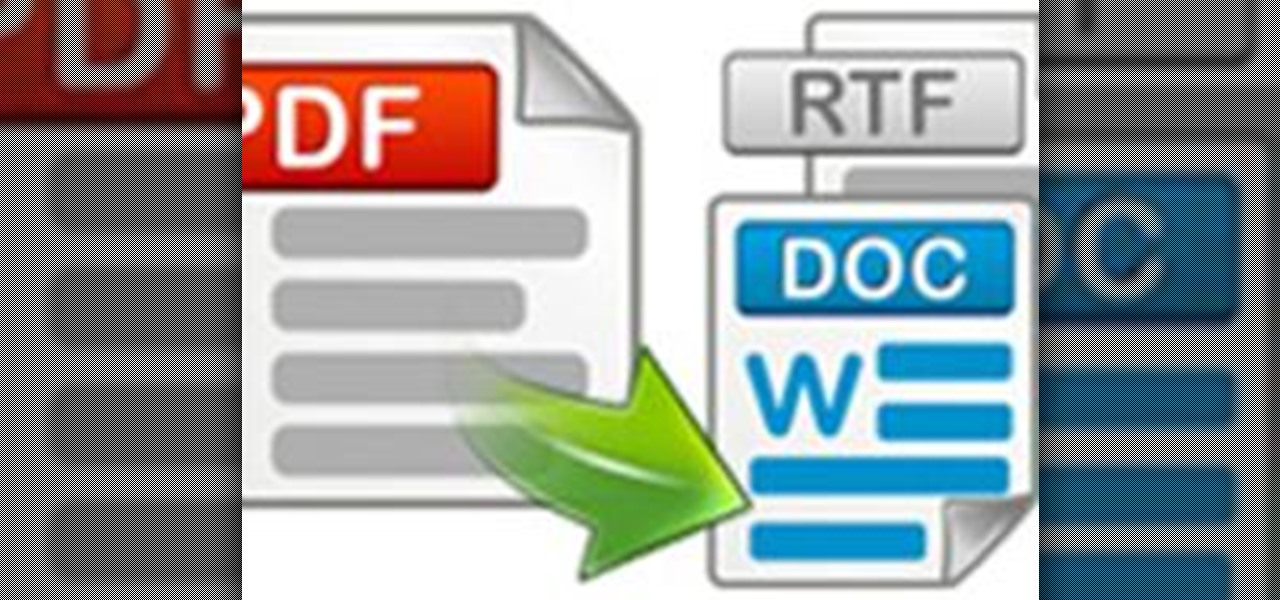
How To: Convert PDF to Word by Using Free Nemo Software
Nemo PDF to Word is a powerful but free tool to help us to convert PDF to Word with a few simple clicks. Even beginners who don't have much computer knowledge can easily manage it.
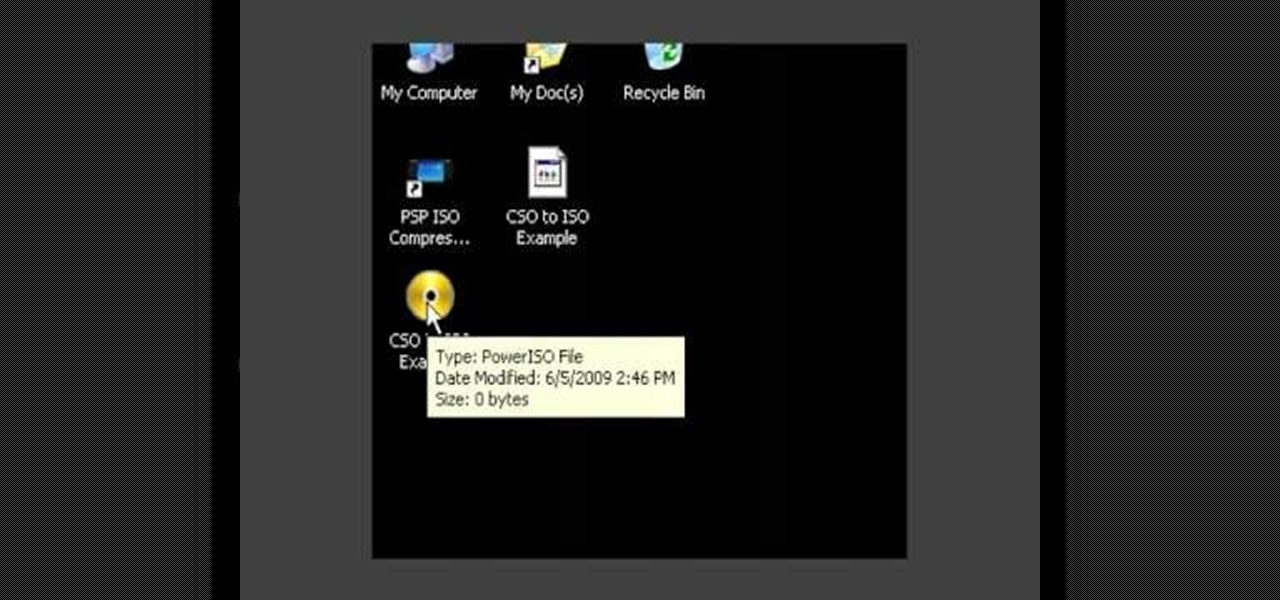
How To: Convert CSO files to ISO very easily
This video will show you exactly how to use PSP ISO compressor to convert CSO image files to ISO image files so that they will play better on a PSP. This will allow you to download either ISO or CSO files and still run the ISO files on your PSP.

How To: Create and apply an ice shader in Luxology Modo
In this clip, you'll learn how to generate and apply a realistic ice shader in modo. Whether you're new to Luxology's popular 3D modeling program or a seasoned graphic artist just interested in better acquainting yourself with the application, you're sure to be well served by this free video tutorial. For more information, including detailed instructions, take a look.
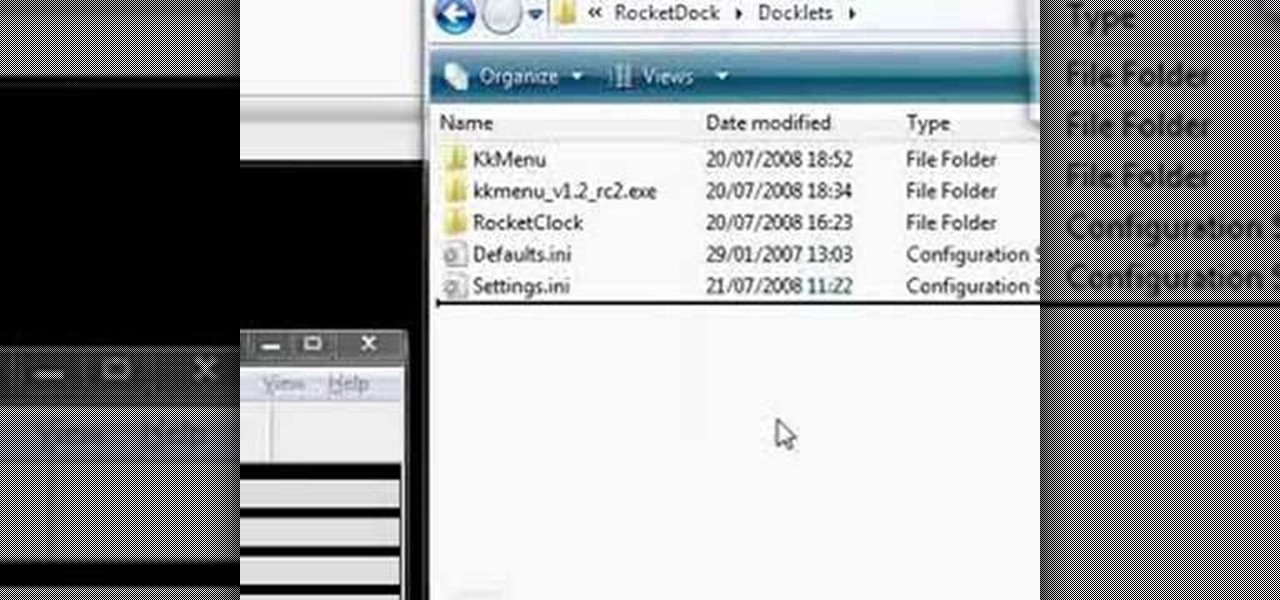
How To: Install and configure the Stack Docklet on RocketDock
RocketDock is a sweet and infinitely customizable program for controlling your PC desktop environment. If you want to get the most out of it, the Stack Docklet is a great add-on that makes it even easier to organize your desktop icons. This video will show you how to install and configure it.
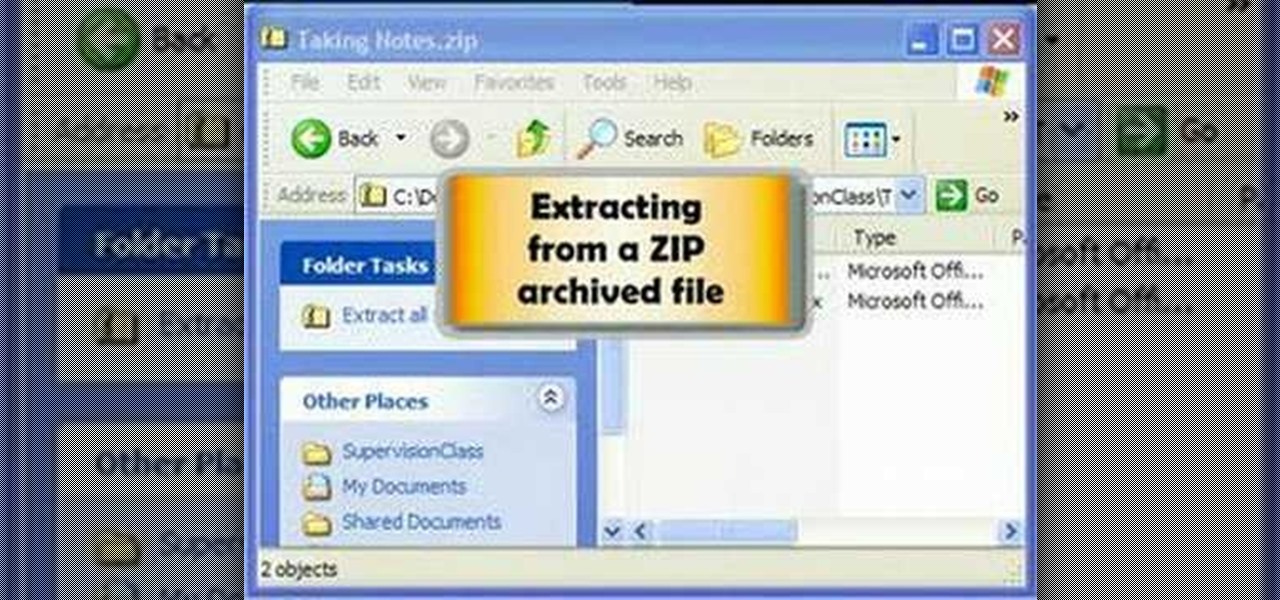
How To: Zip and unzip files in Windows XP
In this tutorial, we learn how to zip and unzip files in Windows XP. First, find the files you want to compress, then highlight them by dragging the mouse. Next, go into the file menu and click "send to", then "compress zip folder". Now, your folder will be created and you can double click it to see the folder viewer of the compressed folder. To open these up from the zip archive, first find the file folder that has been zipped. After this, go to the file menu, then click "extract all" and yo...
How To: Model hair with polygons in Blender 2.49 or 2.5
This clip offers a short overview on modeling hair using mesh planes in Blender 2.49 or 2.5. Whether you're new to the Blender Foundation's popular 3D modeling program or a seasoned graphic artist just interested in better acquainting yourself with the application, you're sure to be well served by this free video tutorial. For more information, including detailed instructions, take a look.
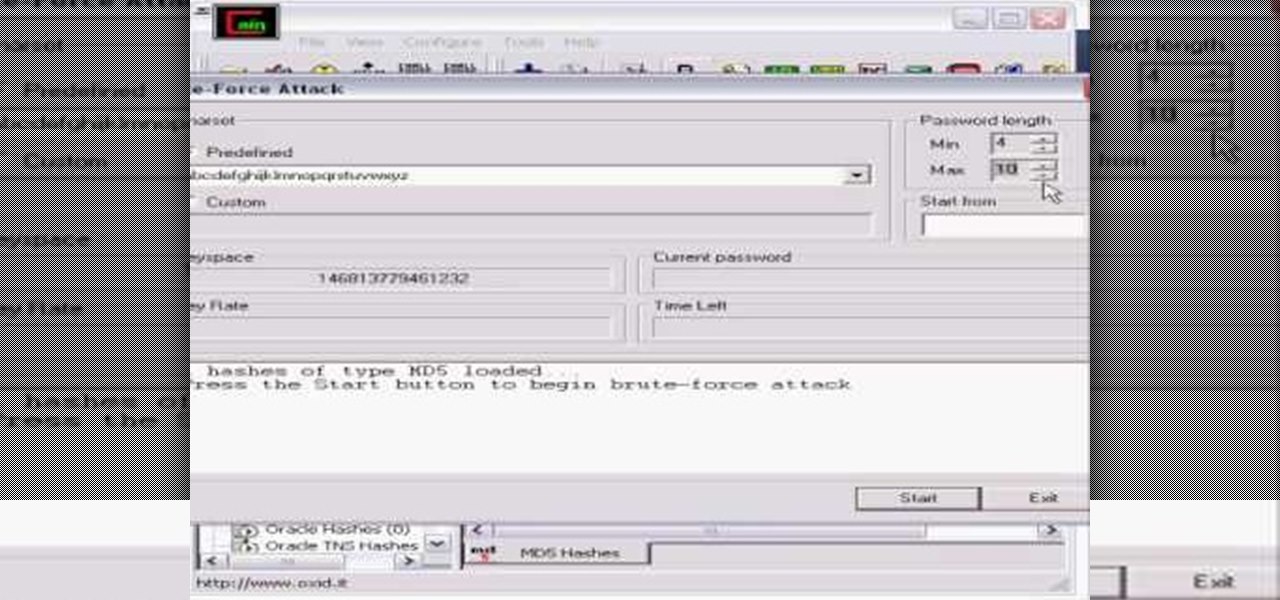
How To: Hack MD5 passwords with Cain and Abel
Whatever your reasons for doing it, if you are trying to hack passwords, it helps to have the right software for getting the job done. With the Cain and Abel program, you will be well on your way to hacking even the toughest personal passwords.
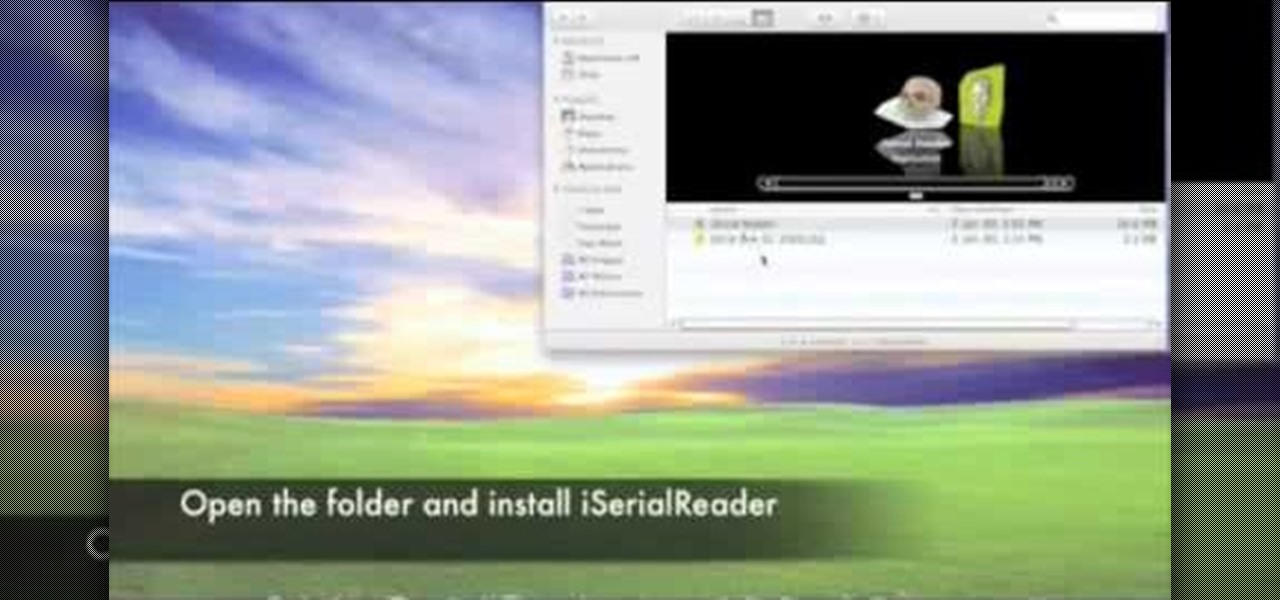
How To: Get iSerial Reader for Mac
In this Software video tutorial you will learn how to get iSerial Reader for Mac. With this program you can get the serial numbers to use for various programs. Almost all programs are listed. There is nothing complicated about this. Download the iSerial reader from Serial Box. Once it is downloaded, open the folder and install it. After you open the program, follow the ‘installing serial box’ instructions. The file to add when you click ‘install now’ is the ‘serial box’ file that came with th...

How To: Use reference lines to control radial shapes in Revit
This CAD software tutorial covers how to use reference lines to constrain or drive radial shapes in Revit Architecture. This can be tricky when using Reference plane but with a reference line it is quite easy. David doesn't get too much into adding parameters but one could imagine using a length parameter to drive the length of the reference line as well as the ellipse. Watch and learn how to model and control radial shapes with reference lines in Revit Architecture. Use reference lines to co...
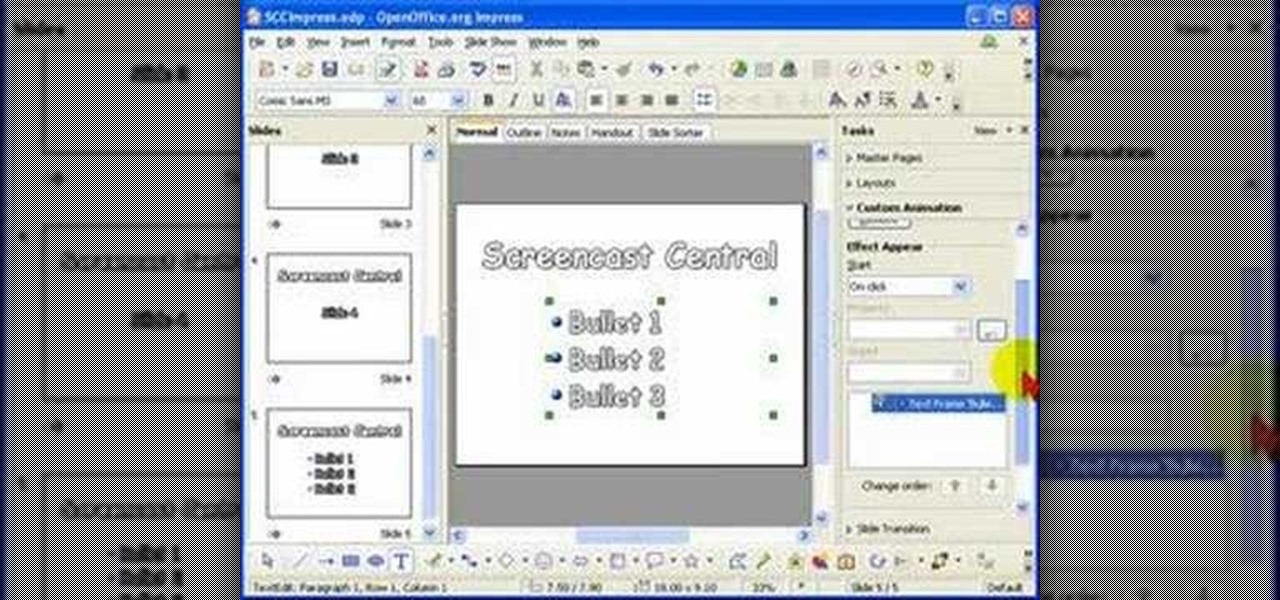
How To: Create animated bullet lists in Open Office Impress
If you're giving a presentation, it's likely that you will have one or more bulleted list, and in most cases you will want to present each bullet point individually.
How To: Make a fancy border in GIMP
Learn how to make a fancy border in GIMP with this GIMP tricks video tutorial. This border can be used to frame images for YouTube videos or other things. Take your image, and go to Image and Canvas Size. The size should be made larger to allow room for your border and then click Center. On Layers, select All Layers. Then, click Resize. This allows you to make room for your Layer. On the far left side, right click on your layer and select Alpha to Selection. Go to Select, To Path, Select, and...
How To: Use the camera fly mode tool in Blender
See how to work with Blender's Camera Fly Mode tool. The tool is a great way to help navigate your 3D scene, and also for camera placement (or any object set to be a "camera", for example a Spotlight). Whether you're new to the Blender Foundation's popular open-source 3D computer graphics application or are a seasoned digital artist merely on the lookout for new tips and tricks, you're sure to be well served by this free video software tutorial from the folks at CG Cookie. For more informatio...
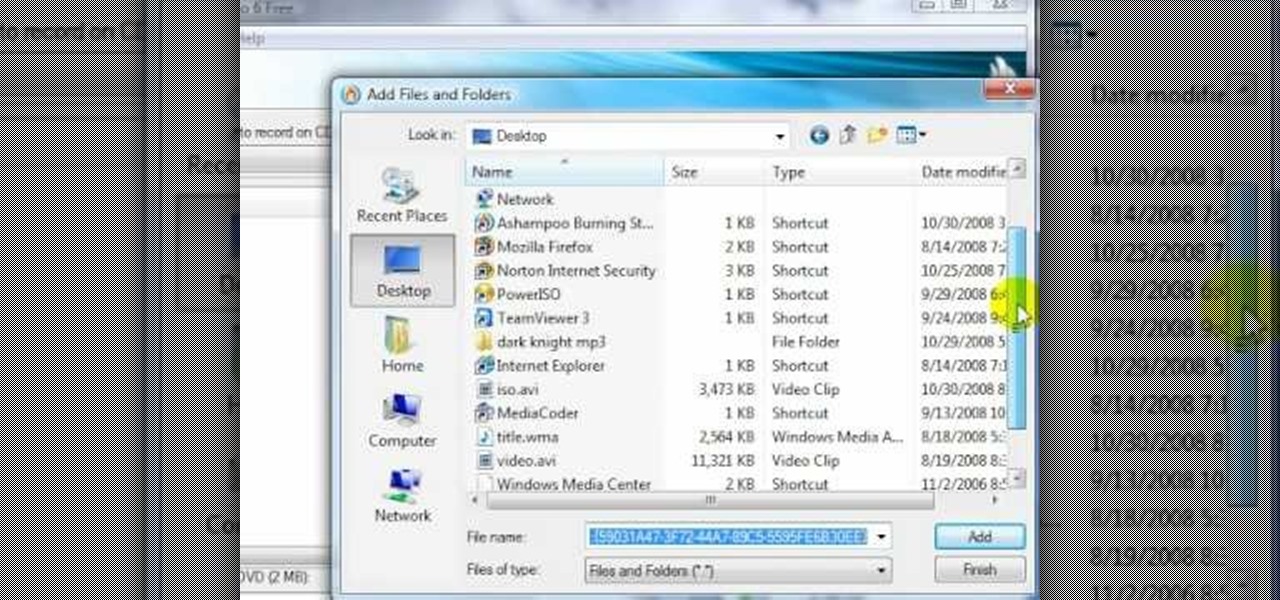
How To: Create an ISO image with Ashampoo Burning Studio 6
In this video tutorial, viewers learn how to create an ISO image. Users will need to download the program, Ashampoo Burning Studio 6. Begin by going to the Google search engine and search for the program. Select the result from download.com. Click on Download Now and save the file. Double-click on the file and follow the instructions to install it. Then open the program and select Create/Burn Disc Images. Select the type of disc image that you would like. Then click on Add and select the file...
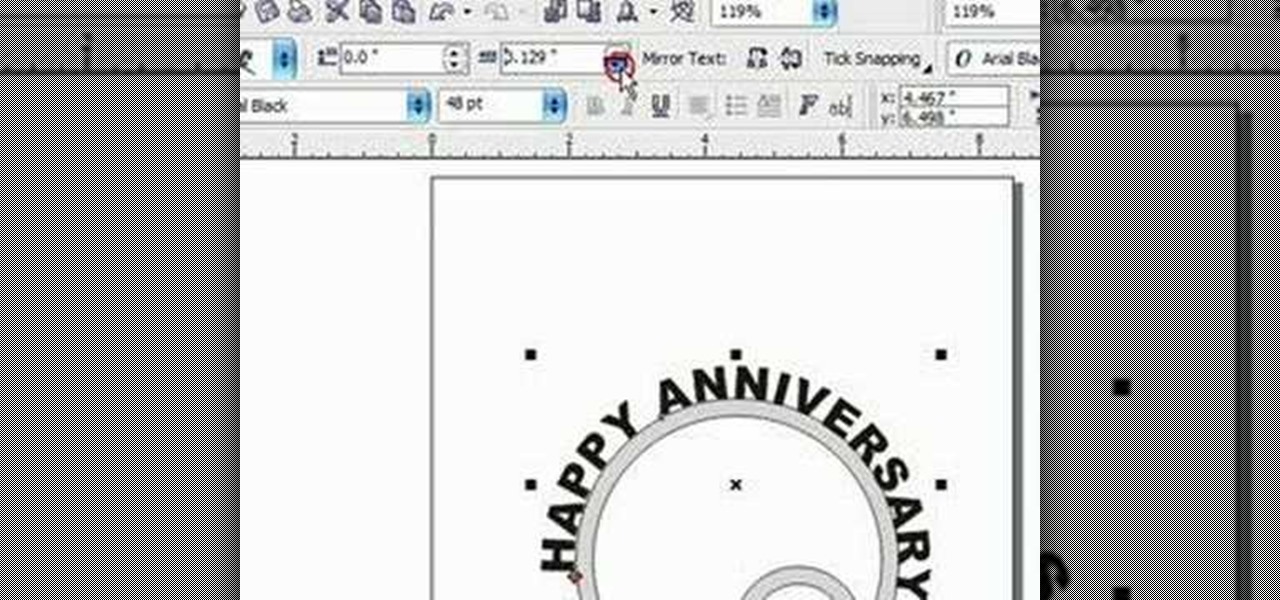
How To: Put text on a curve in Corel Draw X3
This Corel Draw vector graphics drawing software tutorial shows you how to type text along a curve. Specifically you will learn how to draw a curve, and get text to follow the curve as part of making scroll saw patterns. If you are a pattern maker or not, you can learn how easy it is to put text on a curve in Corel Draw X3 in this video.

How To: Download Videos with One Click in Freemake Video Downloader
Looking for the fastest and easiest way to download videos from YouTube, Facebook, MTV, Vevo, and other sites? If so, read this guide. Freemake Video Downloader 2.1 offers a brand new mode to get web videos offline in a single click!
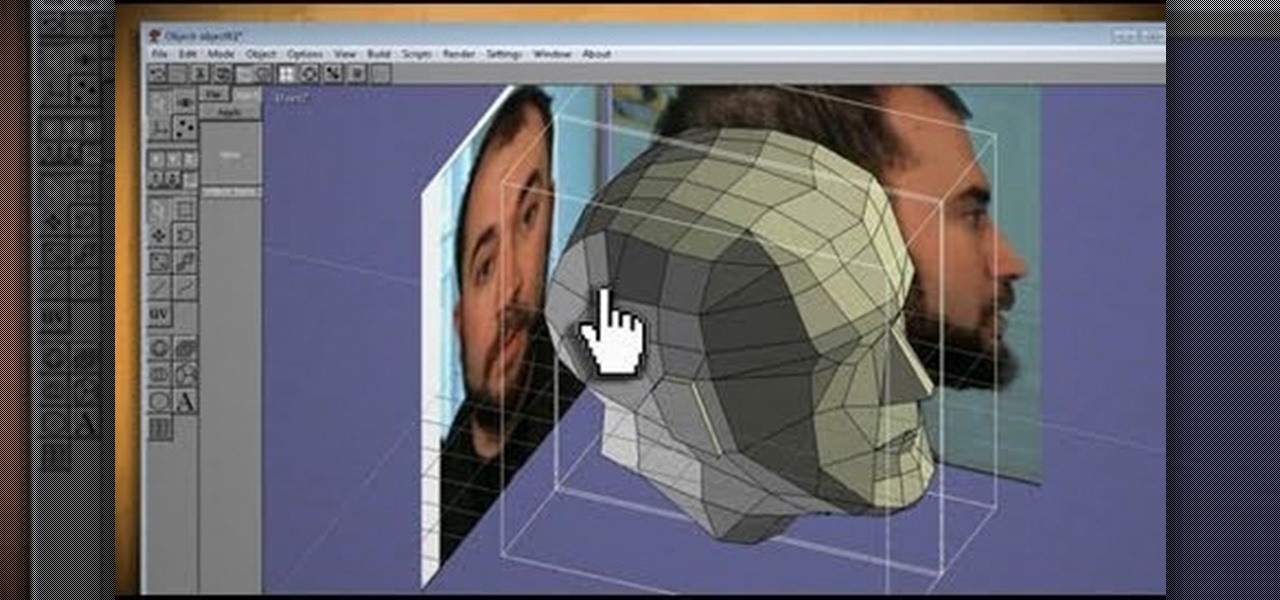
How To: Clone your head, face or anything, then print in 3D, with Anim8or & Pepakura
What could you do with two of you? Or, two cats, or two cars, or two of anything? Cloning, it's the way of the future and this tutorial shows you how to clone and print a 3D model of virtually anything. Using Anim8or and Pepakura Designer you can model your face and print it up to create a 3D mask. Two for the road I say! (Or would that be four?)
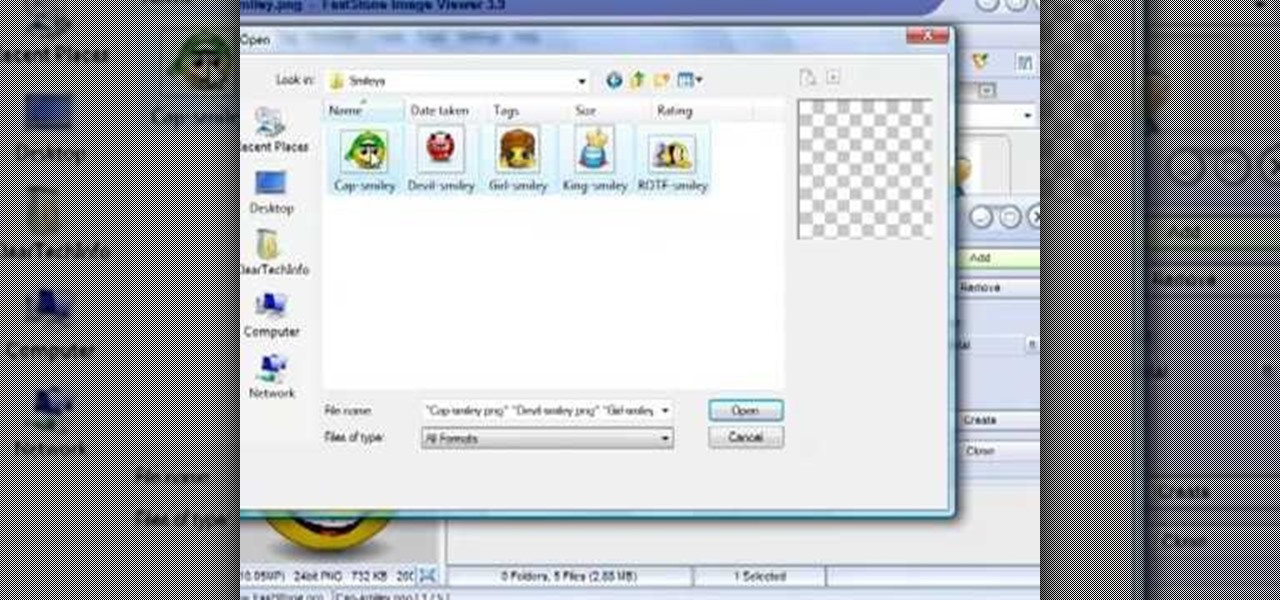
How To: Make an image strip using FastStone Image Viewer
In this tutorial, we learn how to make an image strip using FastStone Image Viewer. First, open up the images that you want to have inside the strip. Then, open up Fastone Image viewer and find the location of the images. From here, go to "create", then "image strip builder". This will bring up the builder window where you can add in the images you want to see on the strip. When finished, click on the "create" button. Now, the strip will come up on your computer in a new image and you will be...
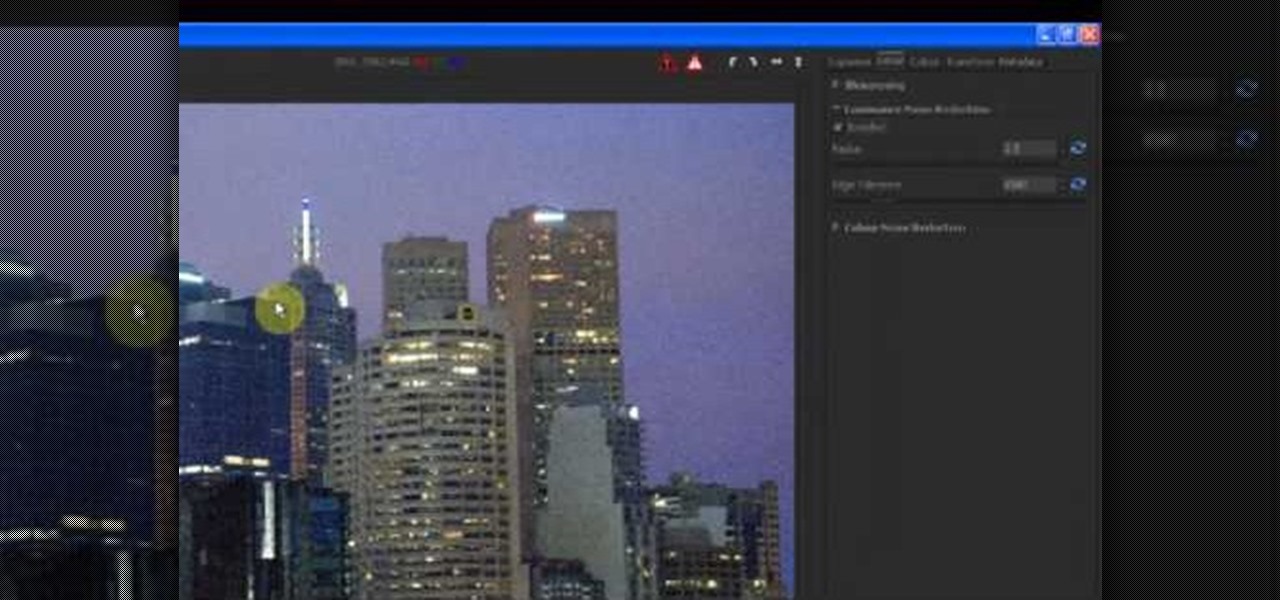
How To: Reduce noise in RAW Therapee
In this tutorial, we learn how to reduce noise in RAW Therapee. First, open up your photo in the software that you want to reduce the noise on. Then, open up the detailed view of the photo and click on then click on the detail button. Through here, you can sharpen the image or you can change the noise reduction for the color and luminance. Click on the drop down menu for the luminance and then enable to checked section. Then, move the edge tolerance to its maximum to see the full effect on th...
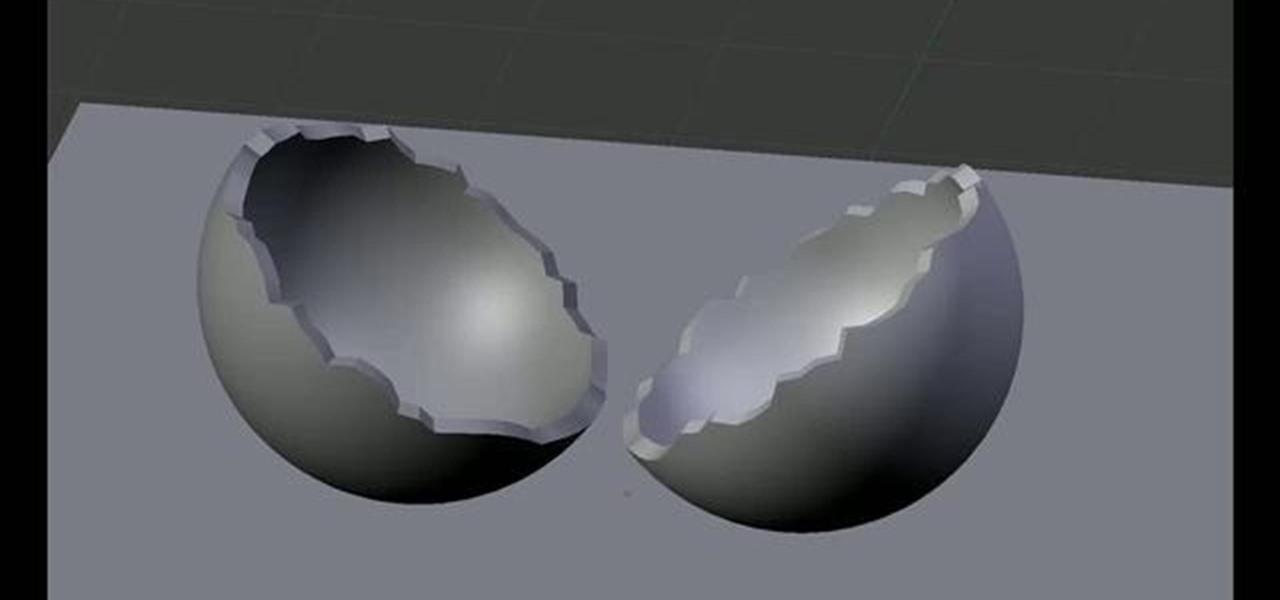
How To: Crack 3D objects in Blender
Learn how to create a crack in a 3D object in two minute or less with this video guide. The technique involves no scripts, just a powerful tool that has been right under your nose for years! Whether you're new to the Blender Foundation's popular open-source 3D computer graphics application or are a seasoned digital artist merely on the lookout for new tips and tricks, you're sure to be well served by this free video software tutorial. For more information, including step-by-step instructions,...
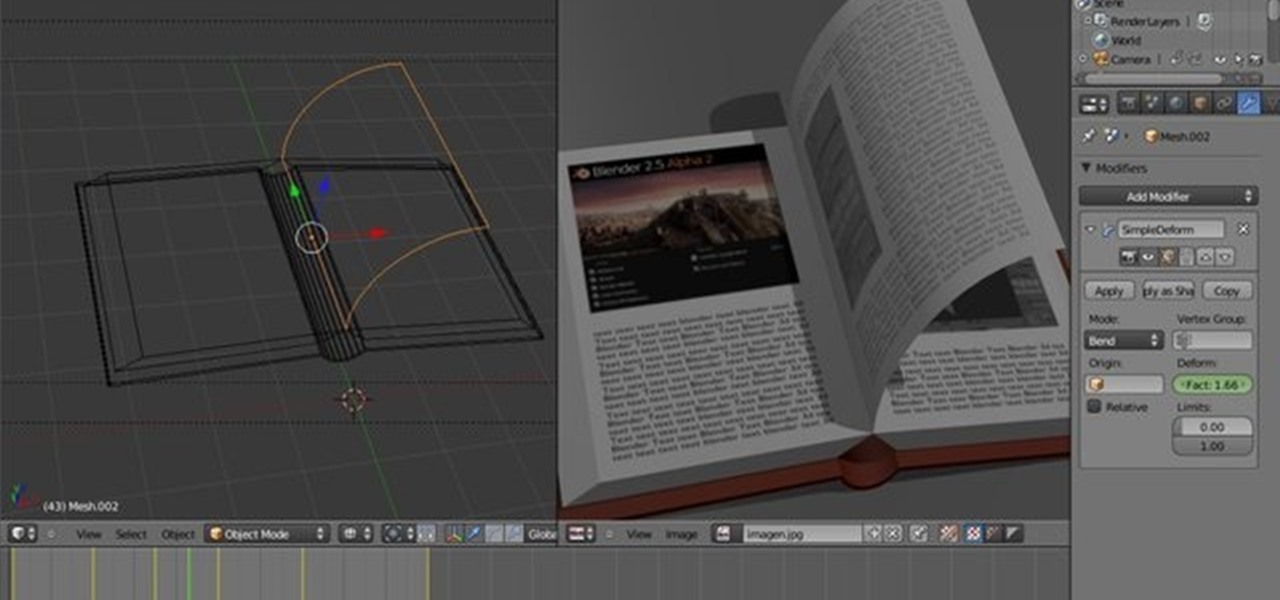
How To: Create a 3D page flip animation with Blender
This clip offers detailed, step-by-step instructions how to create a flip page effect animation by manipulating simple deform modifier parameters. Whether you're new to the Blender Foundation's popular open-source 3D computer graphics application or are a seasoned digital artist merely on the lookout for new tips and tricks, you're sure to be well served by this free video software tutorial. For more information, including step-by-step instructions, take a look!
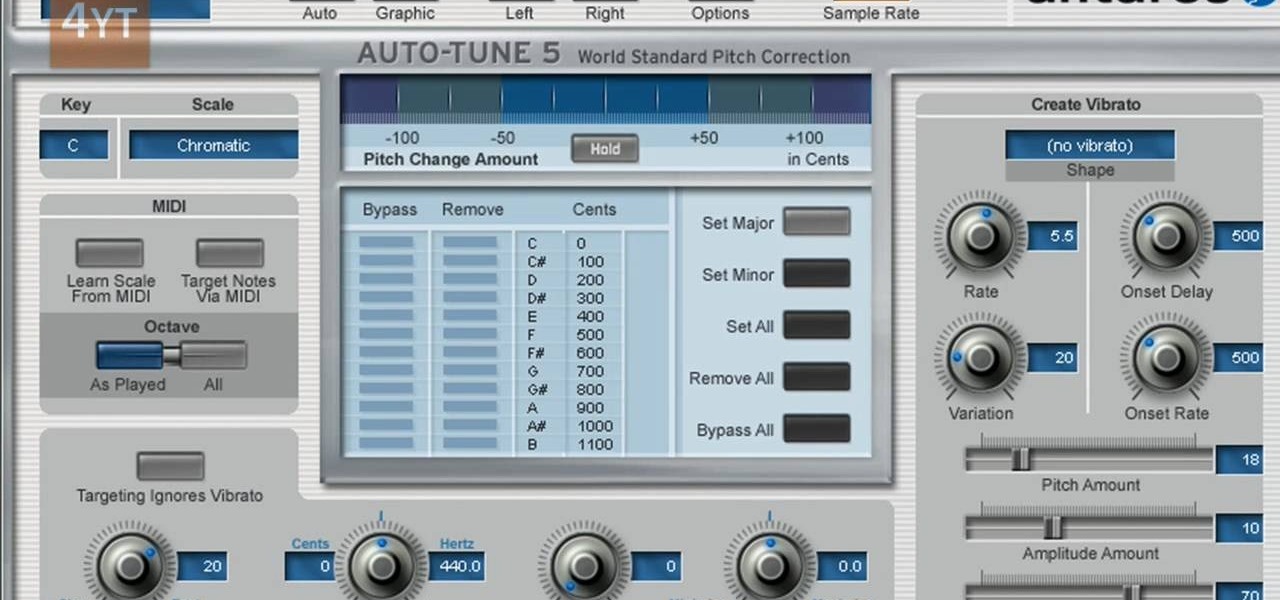
How To: Do the auto-tune effects with Mixcraft
Auto tune is a popular effect made popular by T-pain. To do this you will need two programs. The first one is Auto-tune and the other one is music editing program called Mix craft. You can also use other music editing programs of your choice. Download this programs from their website. You can also use the trial versions. Now open up Mix Craft and under the effects you can find the Auto Tune effects in VST effects. Open some kind of music. Double click and import the required music. You can al...
How To: Fix missing grids in elevation in Revit Architecture
Have you ever had the problem where your grid lines will NOT show up in elevations?!?!?! This is of course after you have checked your VG settings and maximized 3D extents, still NOTHING! Chances are the elevation view is not perpendicular to the grid lines. In most cases this makes sense, how is Revit going to know where you want to intersect the infinite planes of the grid lines. In this Revit tutorial David Fano establishes the point of intersection as the point where the site boundary and...

How To: Make scaling circular patterns in Rhino & Grasshopper
In this Rhino 3D software tutorial covers how to make scaling circular patterns based on the distance between points. You will be using the Grasshopper (Explicit History) plug-in for Rhino in this tutorial.
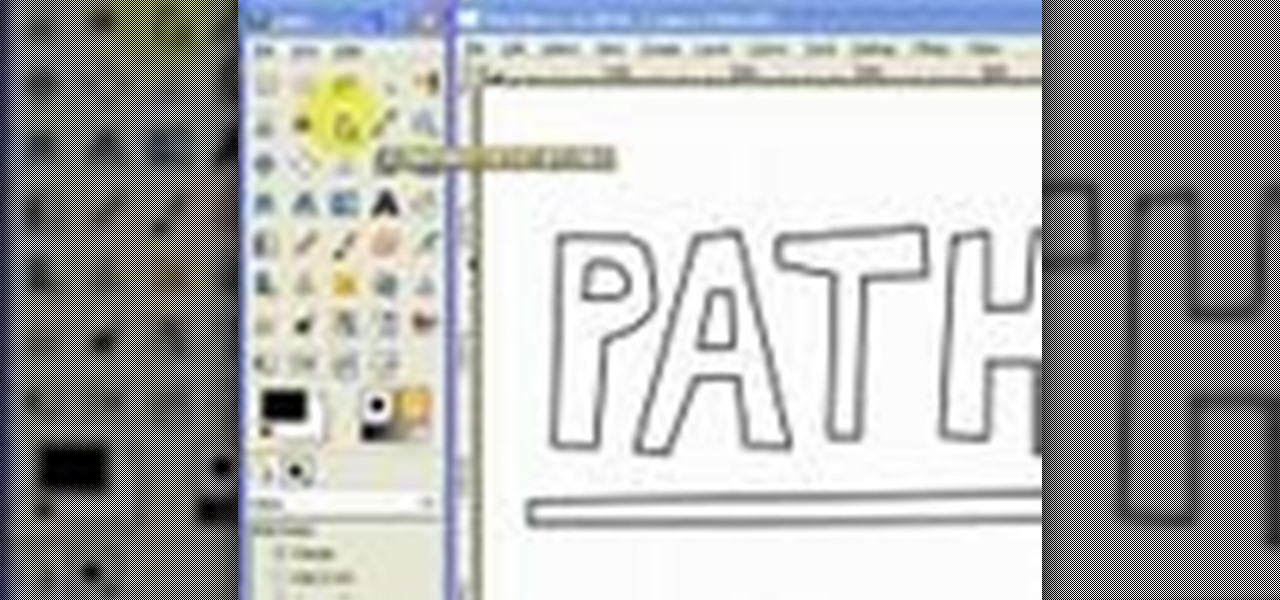
How To: Draw vector art using the path tool in GIMP
This video will introduce you to the basics of creating vector art in GIMP by teaching you to draw using the path tool.
How To: Create Roy Lichenstein style Pop Art in GIMP
Learn how to produce Roy Lichenstein style Pop Art from your photographs using GIMP image editing software.
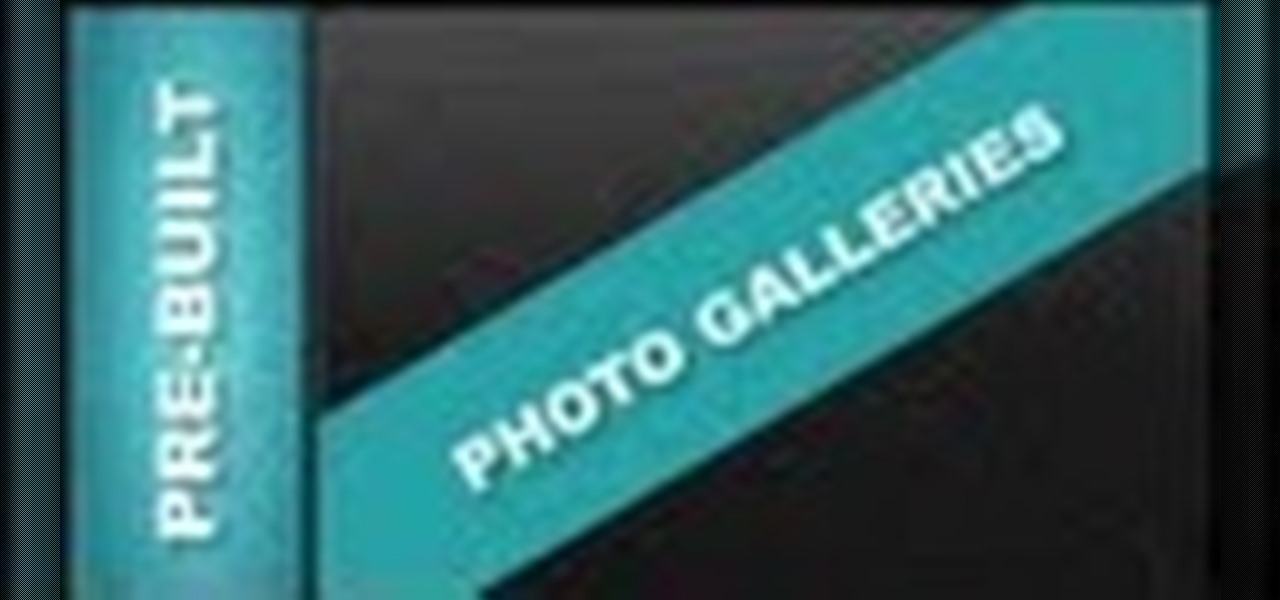
How To: Edit Pre-Built Photo Galleries Xara Web Designer 7 Premium
Tutorial for creating web design photo gallery. This Xara Web Designer Tutorial will give an overview of editing things such as but not limited to: captions, photos, pop-up properties, titles and so on. If you need assistance using Xara Web Designer let us know and we will do our best to create web design tutorials to help you.

How To: Flip Object Horizontal & Flip Vertically in Xara Web Designer
In this Xara web designer tutorial you will learn how to use flip horizontal and vertical feature. The Xara Web Designer flip tool is used to change the orientation of an object. Imagine that the flip tool was a mirror and you could reflect an object in the opposite direction and that will give you an idea of how it works. The Xara Web Designer flip tool is great for creating reflecting objects, which you will get an opportunity to do in a much later tutorial.

How To: Completely Remove Your Hidden Personal Information from Digital Photos
You probably already know that your digital pictures have quite a bit of information embedded in them. What you might not know is just how much personal information is included in that metadata, including your camera information, and in some cases, even the precise GPS coordinates of where you took the picture.
How To: Convert Videos to Different Formats for Free with Format Factory
In my last article, I discussed how you could download almost any video from almost any video sharing site using the free NetVideoHunter add-on in Mozilla Firefox. Now in this article, I will discuss how to convert those videos you’ve downloaded to any format—also for free. Most of the time, the videos you download with NetVideoHunter are in FLV (Flash video) format, which is something that not all video players can play. That’s why I made this article.
Next Page
Prev Page